Prerequisites
Before you begin, make sure you have:- Admin access to your Tented workspace. Connecting, changing settings, and disconnecting are admin-only.
- An approved tent template in Tented. Pages are generated from a template’s approved version. See Templates if you don’t have one yet.
- Permission to install apps in HubSpot. Super admins have it; other users need the App Marketplace access permission.
- AI credits. Each generated page uses half a credit.
Step 1: Connect HubSpot
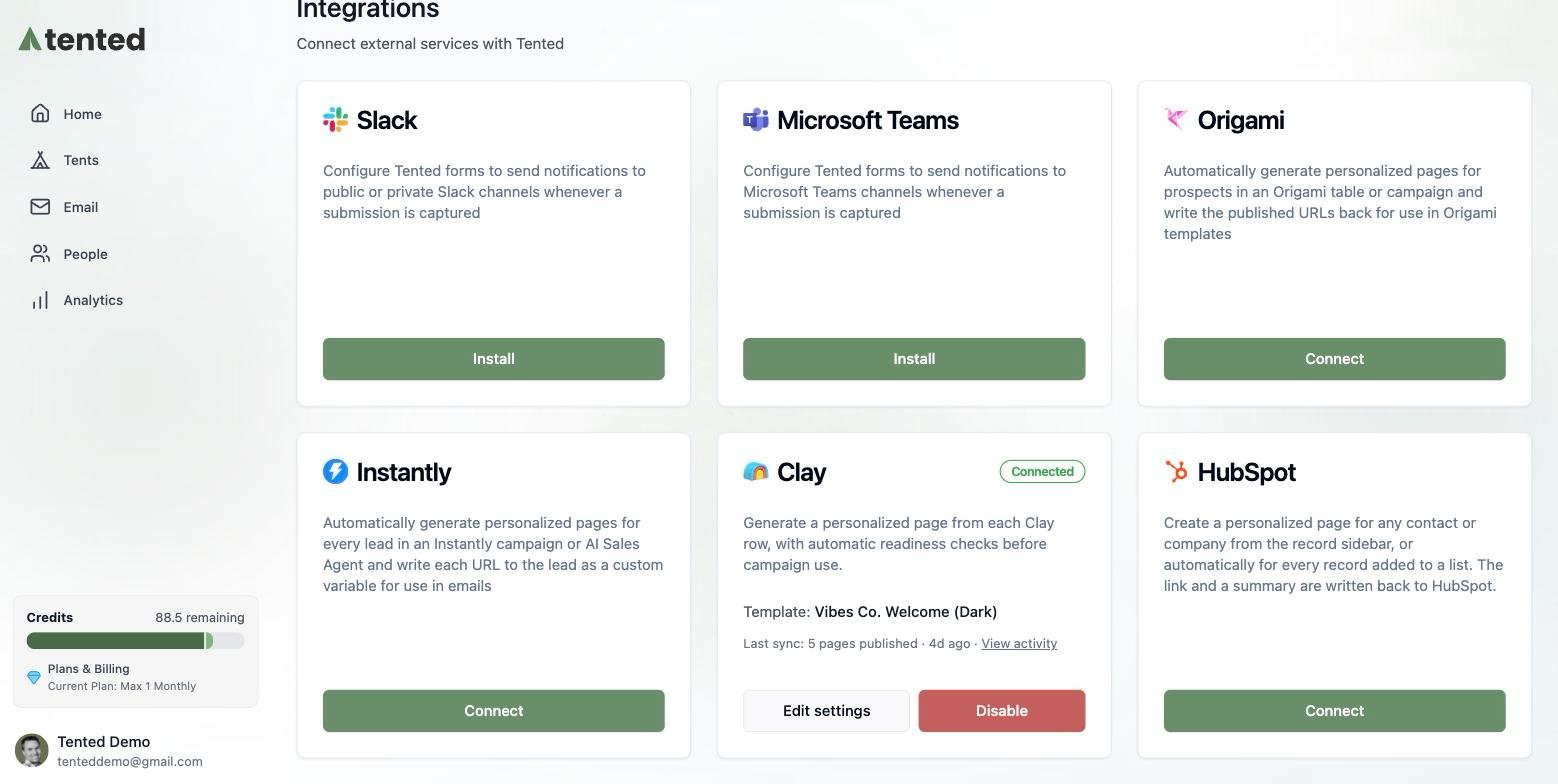
- In Tented, open Settings → Integrations.
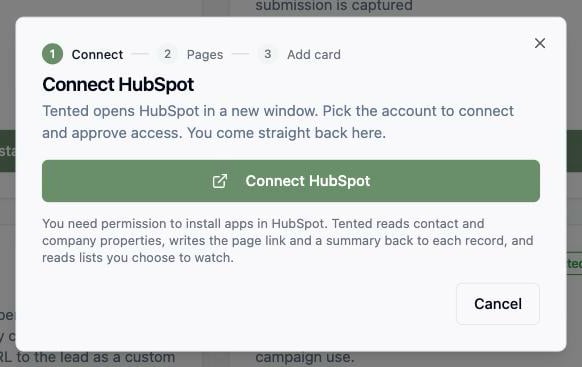
- On the HubSpot tile, select Connect, then Connect HubSpot.
- HubSpot opens in a new window. Pick the account to connect and approve access. The window closes on its own and Tented moves to the next step.
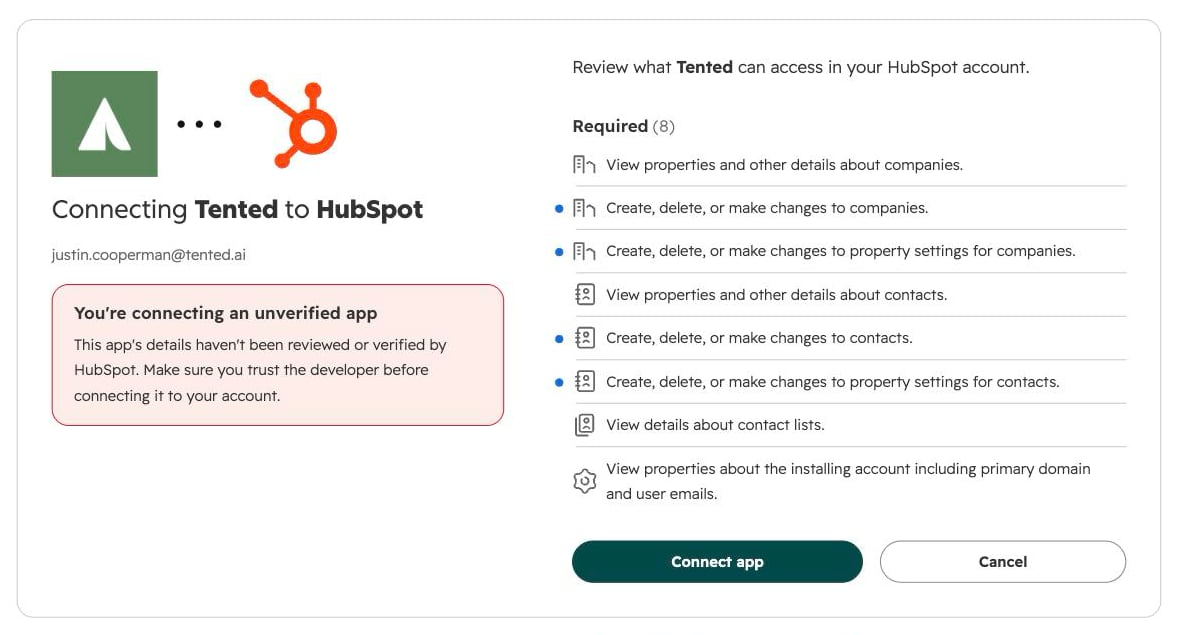
If you installed Tented from the HubSpot App Marketplace instead, HubSpot sends you to this same page in Tented with the connection already made. Sign in as a workspace admin to finish setup.
Step 2: Choose what to generate
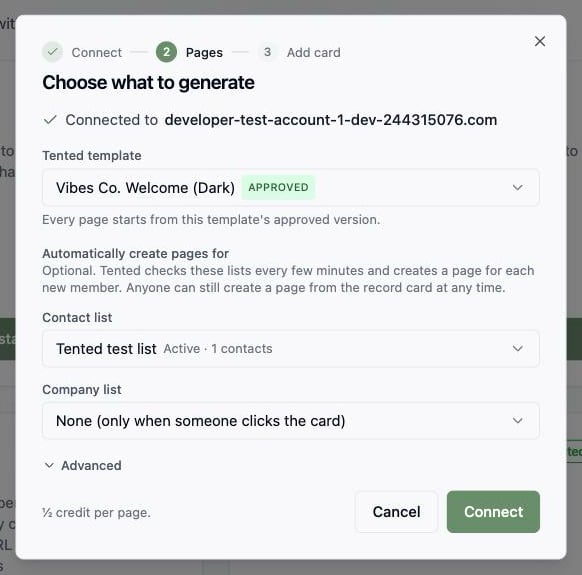
- Tented template: the approved template each page starts from. Tented picks your most recently approved template; change it if you like. Every page is personalized to the record using all of its properties, and for a contact, its company’s properties too.
- Automatically create pages for: optional. Pick a contact list and/or a company list. Tented checks them about every 15 minutes (or straight away when you select Sync now on the tile) and creates a page for every new member. Leave both on None to create pages only when someone clicks the card on a record.
Advanced
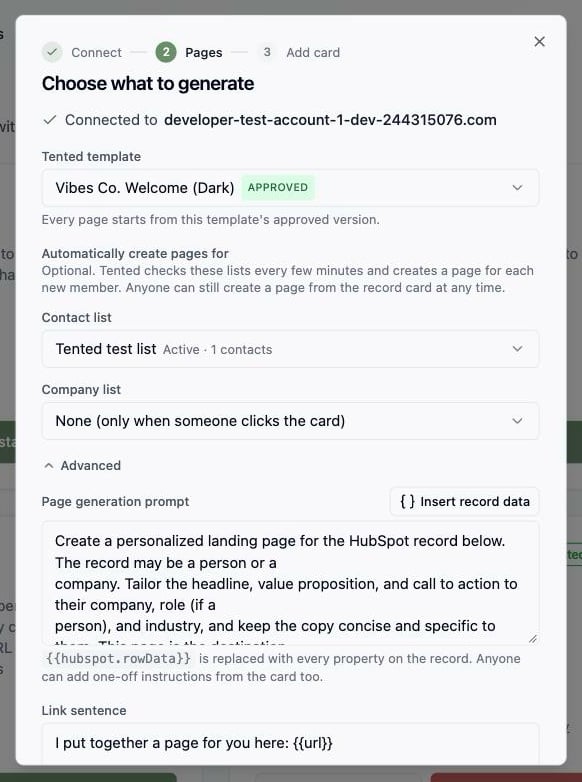
- Page generation prompt: the instructions the page is generated with.
{{hubspot.rowData}}is replaced with every property on the record. Reps can also add one-off instructions from the card for a single page. - Link sentence: written to the record as
tented_page_offer. Use{{url}},{{first_name}},{{company_name}},{{job_title}}, and{{summary}}. Leave it empty to skip it. - Follow-up sentence: written as
tented_page_referencefor a later email or sequence step.
Step 3: Add the Tented card to records
HubSpot only shows an app’s card on records after someone adds it to the record view. Tented can’t do this for you, so the last step of setup in Tented walks you through it:- Open any contact in HubSpot.
- Select Customize record at the top of the record, then Default view.
- In the right sidebar, select + where the card should sit, choose Tented personalized page, and save.
- Repeat on a company.
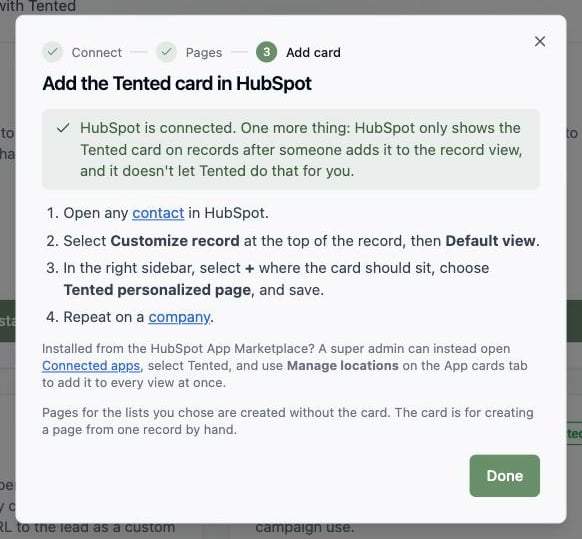
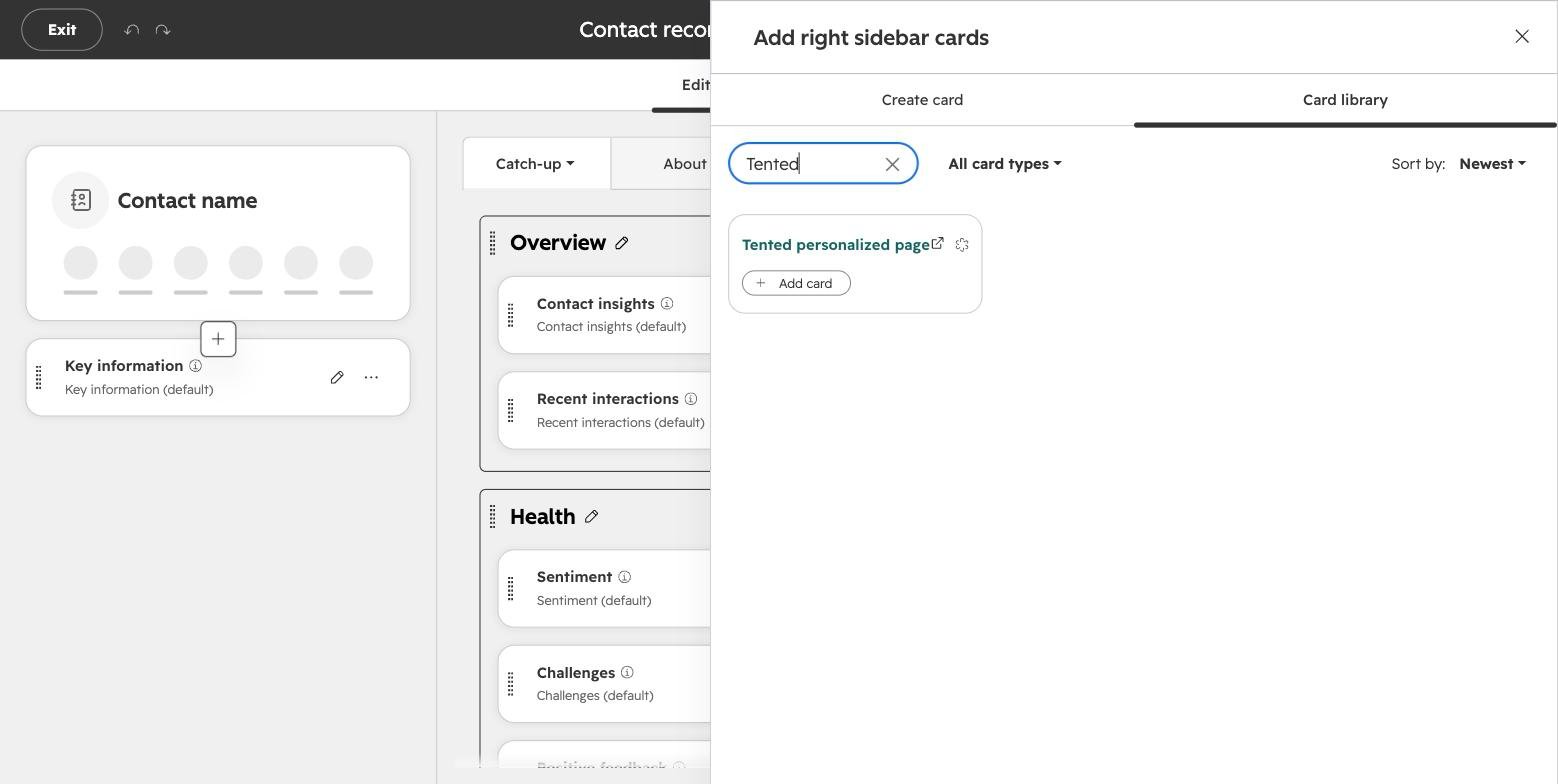
Pages for the lists you chose in Step 2 are created without the card. The card is for creating a page from one record by hand.
Step 4: Create a page from a record
Open any contact or company in HubSpot. The Tented personalized page card sits in the right sidebar.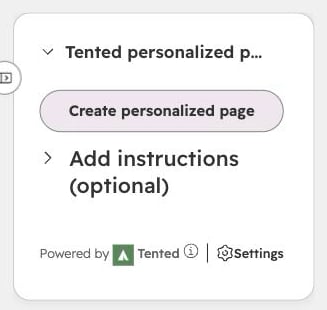
- Select Create personalized page. Expand Add instructions first if this page needs something specific, such as leading with a recent funding round.
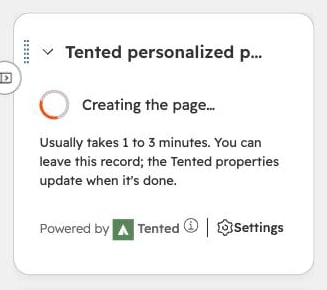
- The card shows Creating the page… while Tented works, usually one to three minutes. You can leave the record; the Tented properties update when it’s done.
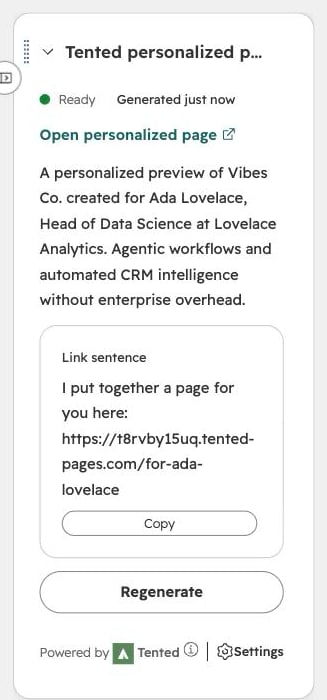
- When the page is ready, the card shows the link, the summary, and the link sentence to paste into an email.
Using the fields in HubSpot
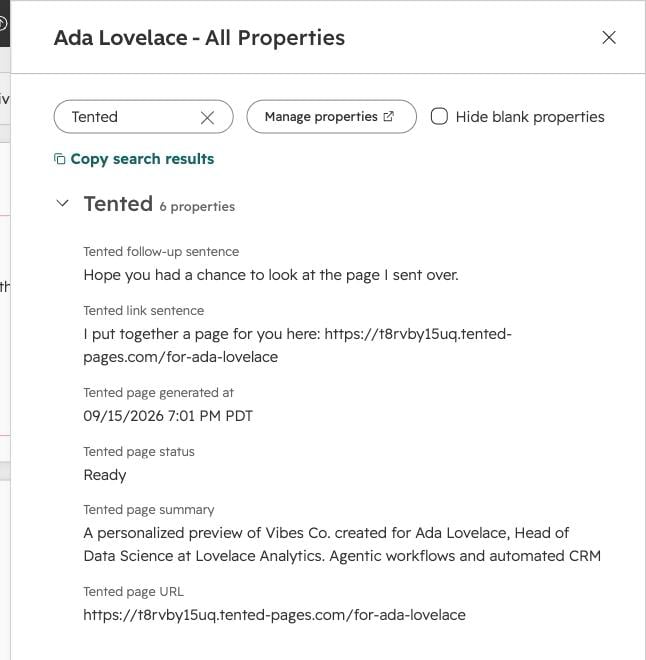
Tented writes these properties to every contact or company it makes a page for:
Insert them as personalization tokens wherever HubSpot offers its Personalize menu, such as a sequence step, a sales email template, or a marketing email: pick the contact (or company) property named Tented page offer. Filter a list or branch a workflow on Tented page URL is known so only records with a live page get the step that links to it. Prefer the URL over Tented page status is Ready: while a page is being regenerated the status reads Generating for a few minutes even though the existing link still works.
What happens after connecting
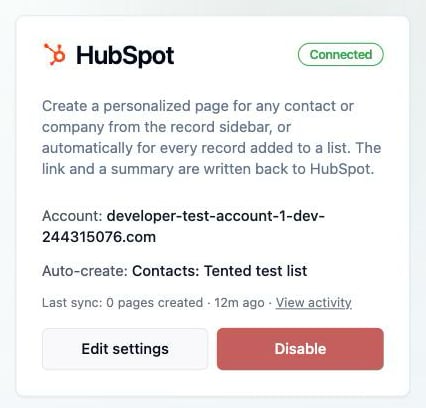
- The HubSpot tile shows Connected, the account, and which lists create pages automatically.
- Pages are published at readable URLs under your Tented domain, such as
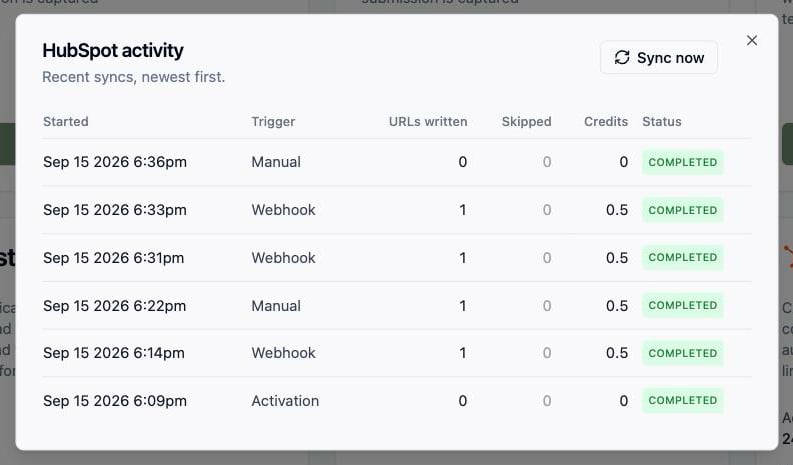
https://your-domain/for-ada-from-analytical-enginesfor a contact orhttps://your-domain/for-acme-cofor a company. - Select View activity on the tile to see each sync, how many pages were created, and any records Tented skipped and why. Sync now checks your lists straight away instead of waiting for the next pass.
- Generated tents appear in your Tents list with HubSpot Integration as the creator. Use Filter → Hide integration-created to keep them out of the way.