Before you import
Any CSV with a header row works. A typical file looks like this:- Every contact needs an email or phone number — rows without one can’t be created.
- Column names don’t need to match Tented’s field names exactly; you’ll get a mapping step.
- Columns can map to custom fields too — and you can even create new custom fields during the import.
Step 1: Upload your file
Go to People > Add > Import from CSV and drag your file in (or click to browse).
Step 2: Map your columns
Tented reads your header row and auto-maps each CSV column to a contact field. For each column you can:- Change the target field — any standard or custom field
- Choose the overwrite behavior — if a contact already exists (matched by email), decide whether the imported value should overwrite a field that’s already filled or leave it alone
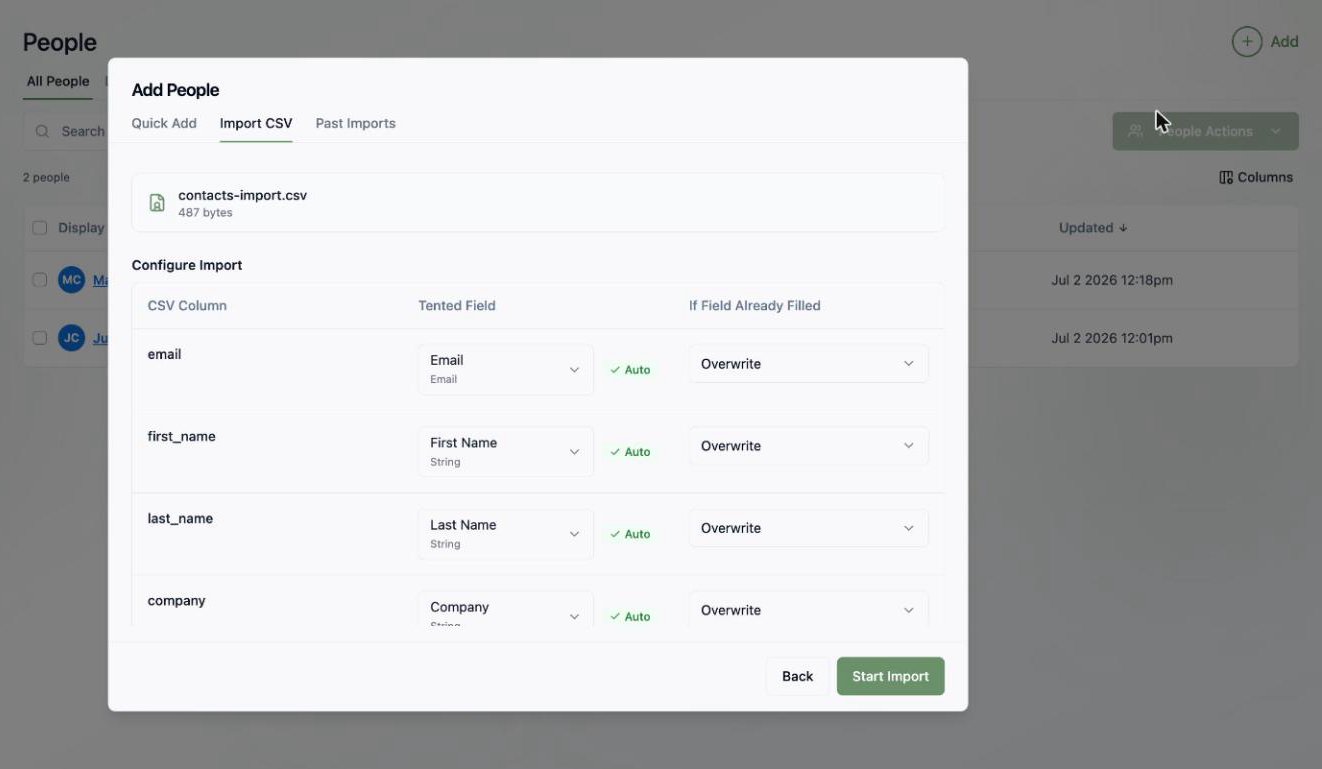
Imports update existing contacts rather than creating duplicates — a row whose email matches an existing contact updates that contact according to your overwrite settings.
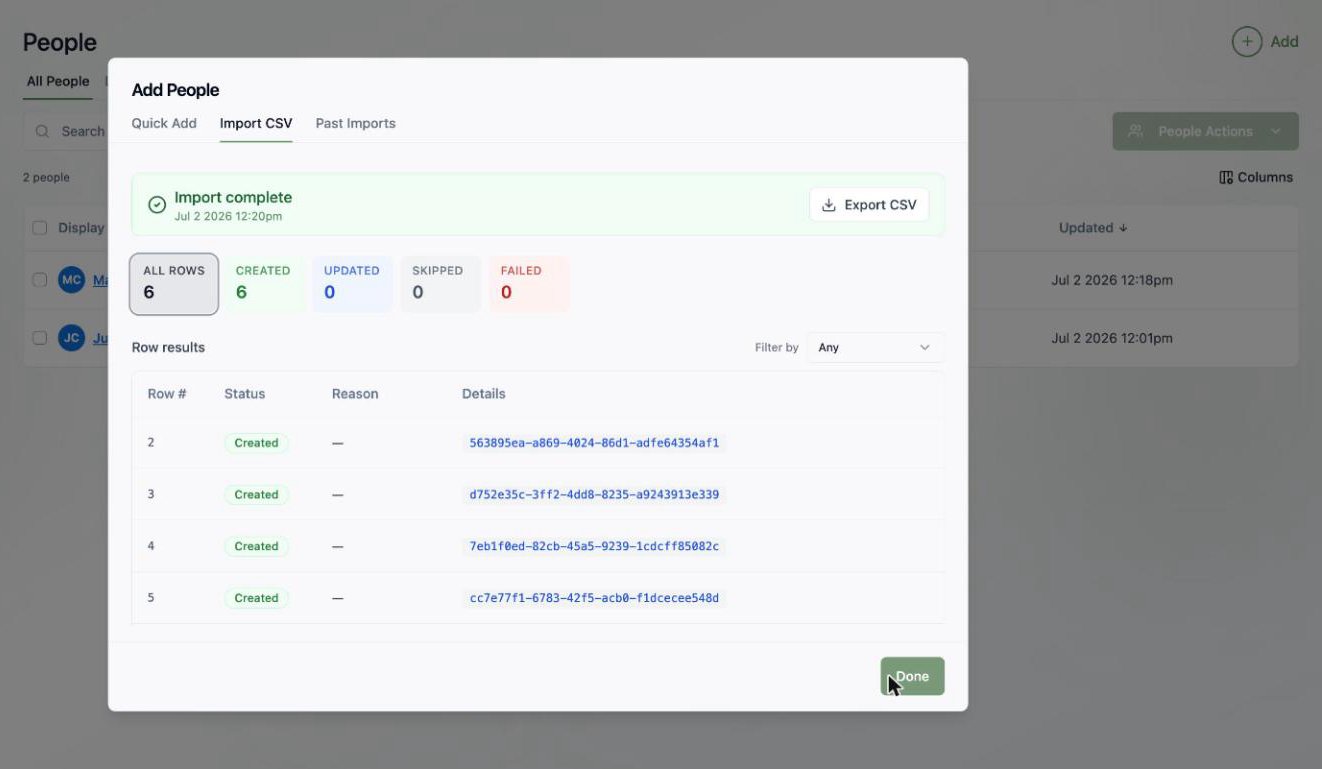
Step 3: Start the import
Click Start Import and watch rows process in real time. When it finishes you get a full report:- Created / Updated / Skipped / Failed counts, with a filterable row-by-row breakdown
- A reason for every skipped or failed row
- Export CSV to download the results for your records
Reviewing past imports
The Past Imports tab in the Add People dialog keeps a history of every import — handy when you’re trying to work out where a contact came from. Each contact’s Activities timeline also records “Person Created — Source: List Import.”What’s next?
Organize them into lists
Turn your imported contacts into targeted audiences.
Customize your fields
Add custom fields so your CSV columns have a proper home.