What’s a triggered flow?
A triggered flow is marketing automation on autopilot: contacts enter when they match a trigger, then move through the steps you’ve laid out — sending emails, waiting, branching, updating fields — until they reach the end. Welcome series, onboarding sequences, re-engagement campaigns: this is where they live. Head to Email > Campaigns and click Create Triggered Flow. Name it, and you land on the visual flow builder with three tabs: Overview (analytics), Edit Flow (the canvas), and History.Set the trigger
Click the Trigger node to choose how contacts enter:
- Added to Static List — the classic welcome-series trigger
- Removed from Static List
- Date Based — on, before, or after a contact date field
- Contact Created — the moment someone new hits your database
- Contact Updated — when a contact field changes
- Form Submitted — when a visitor submits a form on one of your tents 🏕️
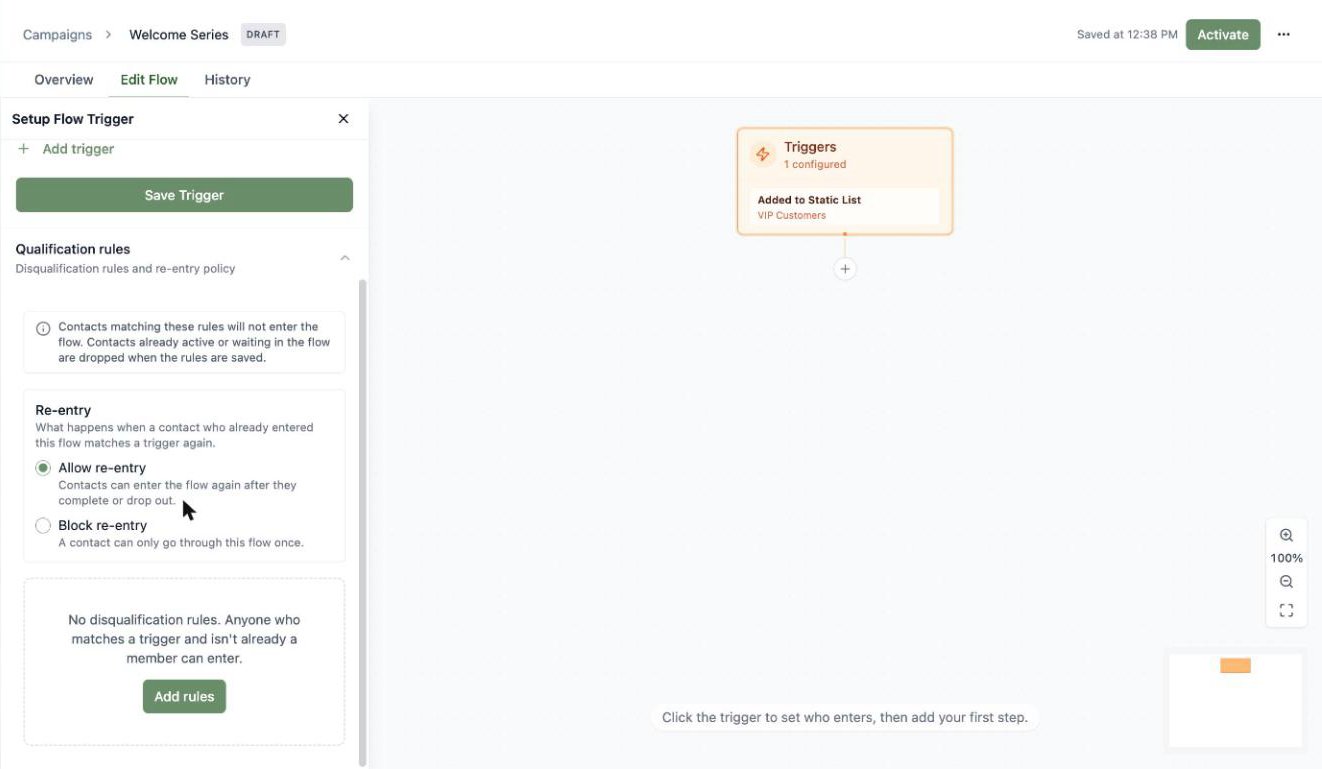
Qualification rules
Below the triggers you’ll find Qualification rules — the fine print of who gets in:- Re-entry policy: allow contacts to go through the flow again after they finish (or block them to once ever).
- Disqualification rules: audience rules that keep matching contacts out — for example, exclude anyone whose lifecycle stage is already “Customer” from a lead-nurture flow.
Build the steps
Click + anywhere on the canvas to add a step. You’ve got a full automation toolkit: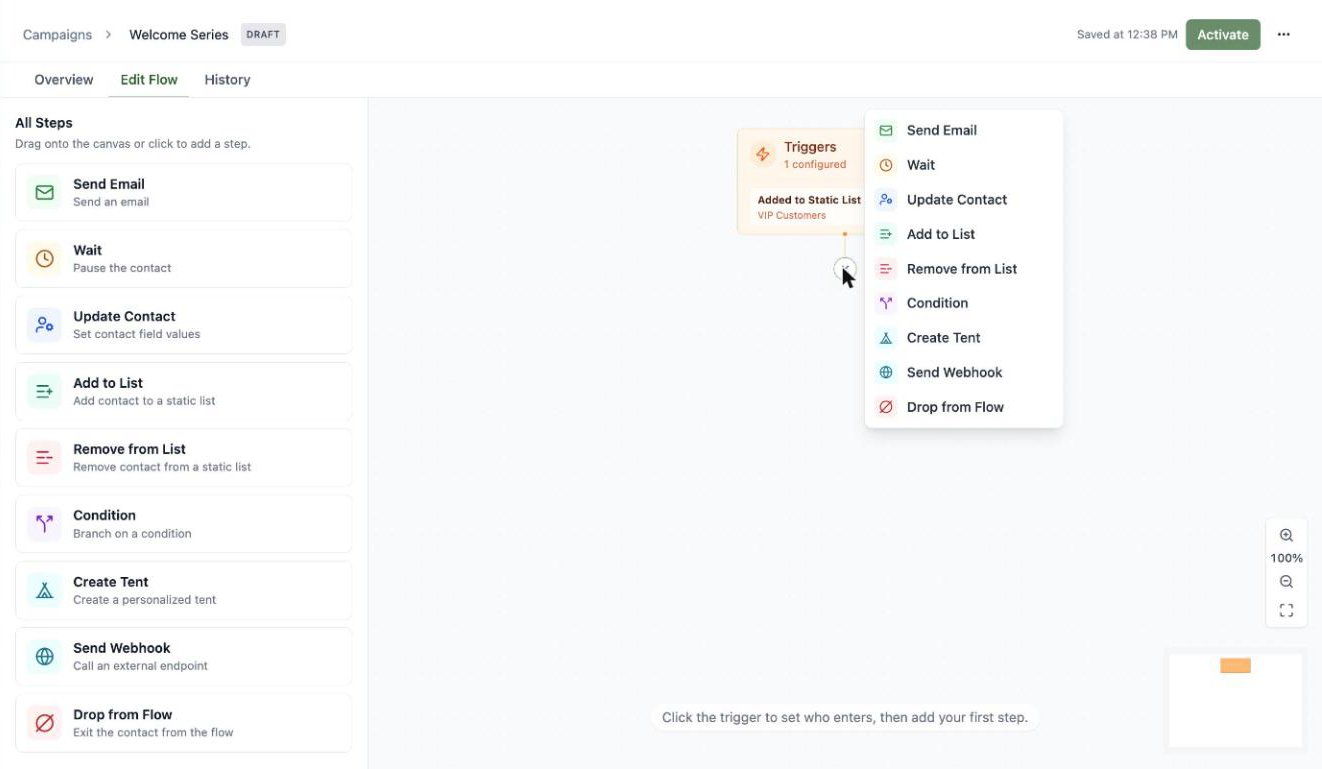
| Step | What it does |
|---|---|
| Send Email | Send an approved (or inline) email |
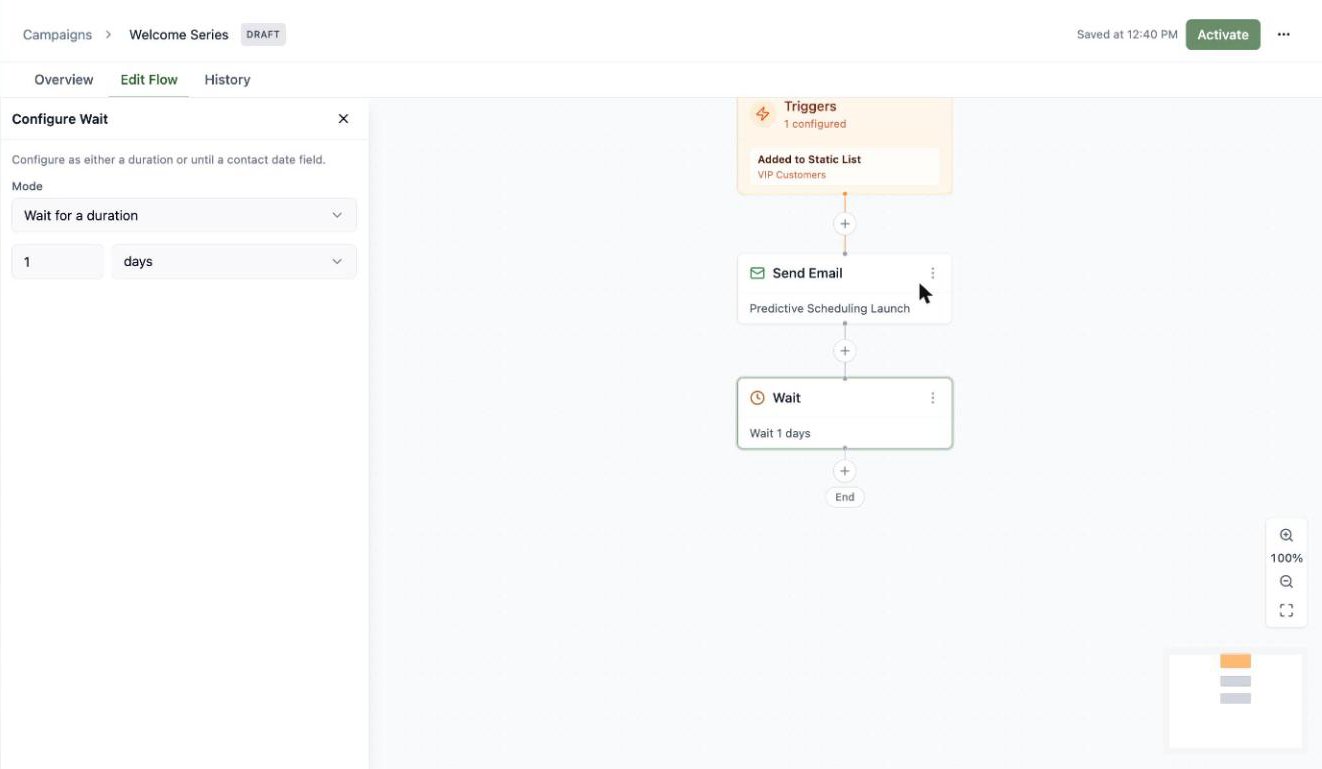
| Wait | Pause for a duration, or until a contact date field |
| Update Contact | Set contact field values |
| Add to List / Remove from List | Manage static list membership |
| Condition | Branch the journey based on audience rules |
| Create Tent | Generate a personalized landing page for the contact |
| Send Webhook | Call an external endpoint |
| Drop from Flow | Exit the contact early |
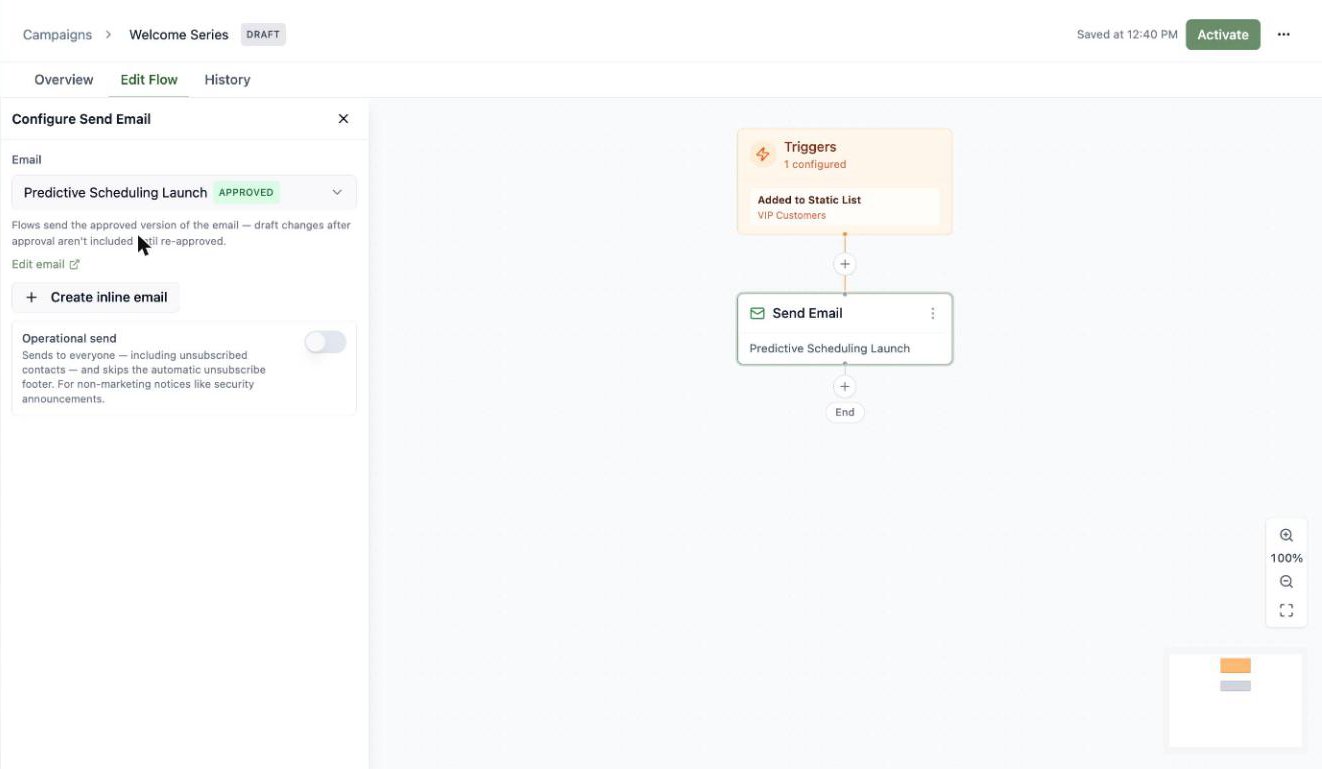
The Create Tent step
The Create Tent step generates a personalized landing page for each contact as they pass through the flow — a unique page per person, built from their contact data.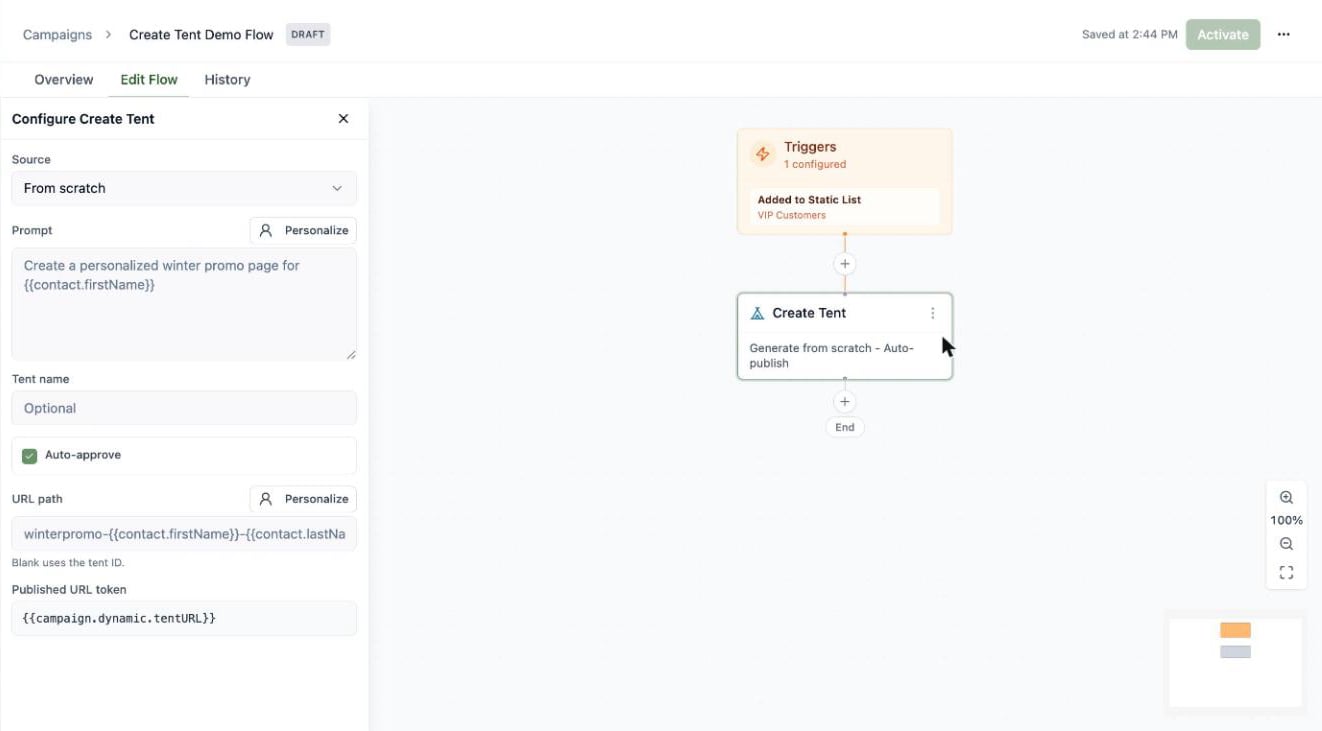
-
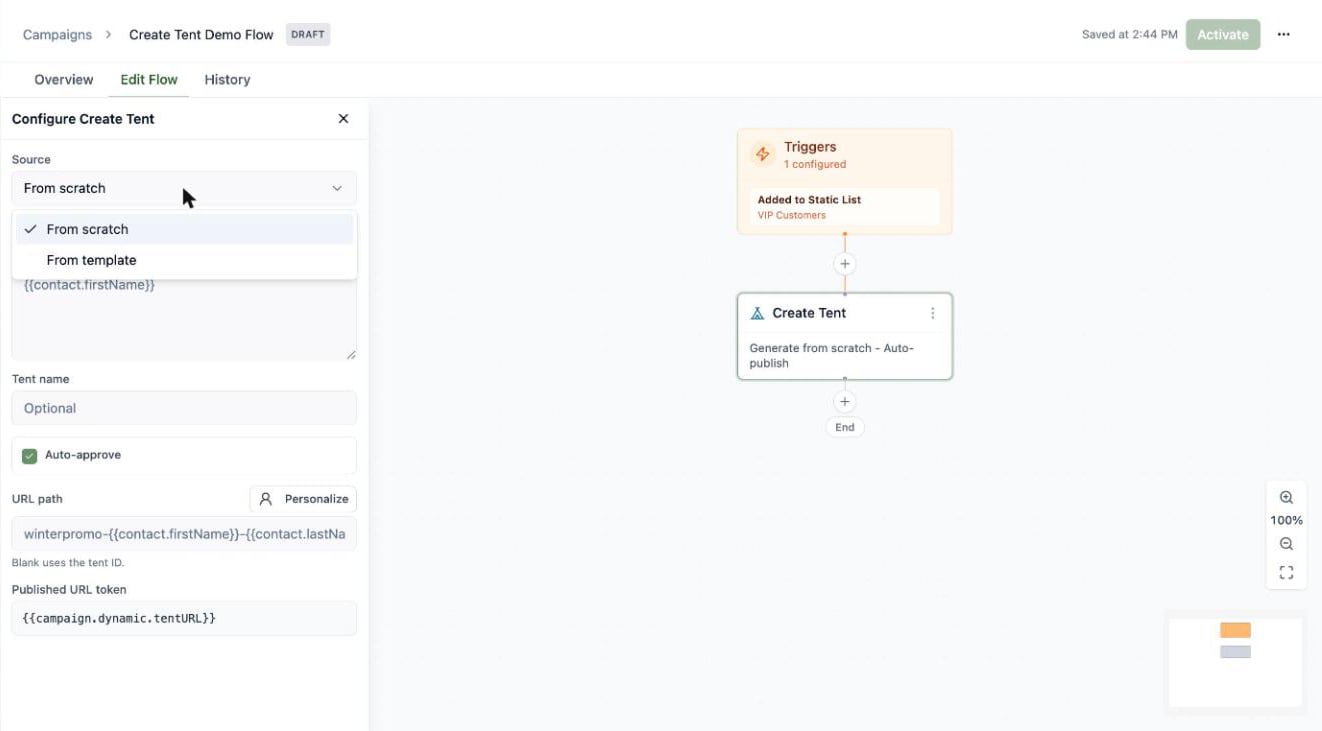
Source — From scratch (generate with AI from a prompt) or From template (copy an approved tent template, no generation credits).
-
Prompt — what to generate. Click Personalize to drop in contact tokens like
{{contact.firstName}}, so every contact gets a page tailored to them. - Tent name and URL path — both optional and both personalizable; a blank URL path falls back to the tent ID.
- Auto-approve — publish the generated tent automatically, so it’s live the moment it’s created.
Activate it
Click Activate and your flow goes live: from now on, contacts matching a trigger are enrolled automatically and start moving through the steps.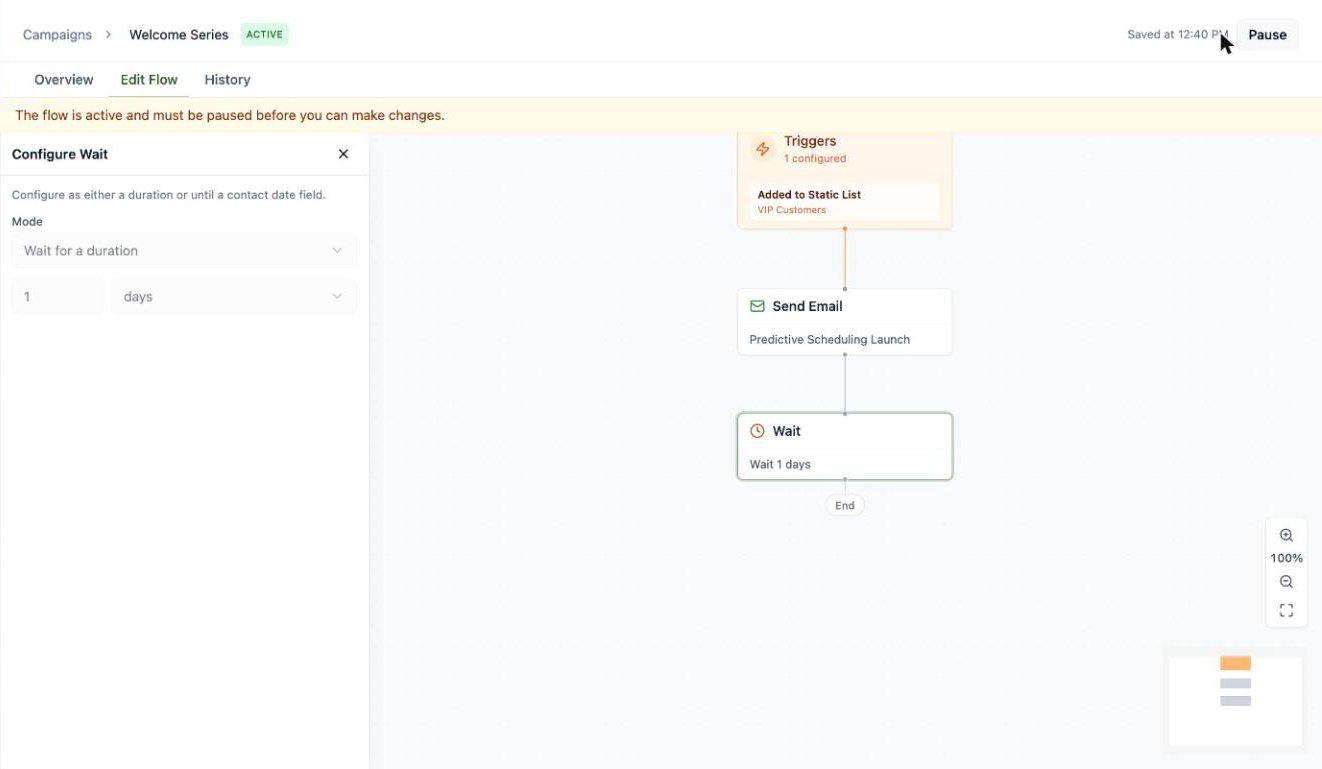
Active flows are locked for editing — hit Pause first if you need to make changes, then reactivate. Pausing doesn’t kick anyone out: contacts already in the flow simply wait, and pick up where they left off when you reactivate. Triggers fire on new events after activation (evaluated about once a minute); contacts already on a list won’t enter an “Added to Static List” flow retroactively.
Track performance
The Overview tab shows your flow’s vitals: total contacts entered, how many are currently waiting, the most recent entry, who’s parked at each Wait step, and per-email stats (sent, delivered, opened, clicked, bounced, unsubscribed, spam).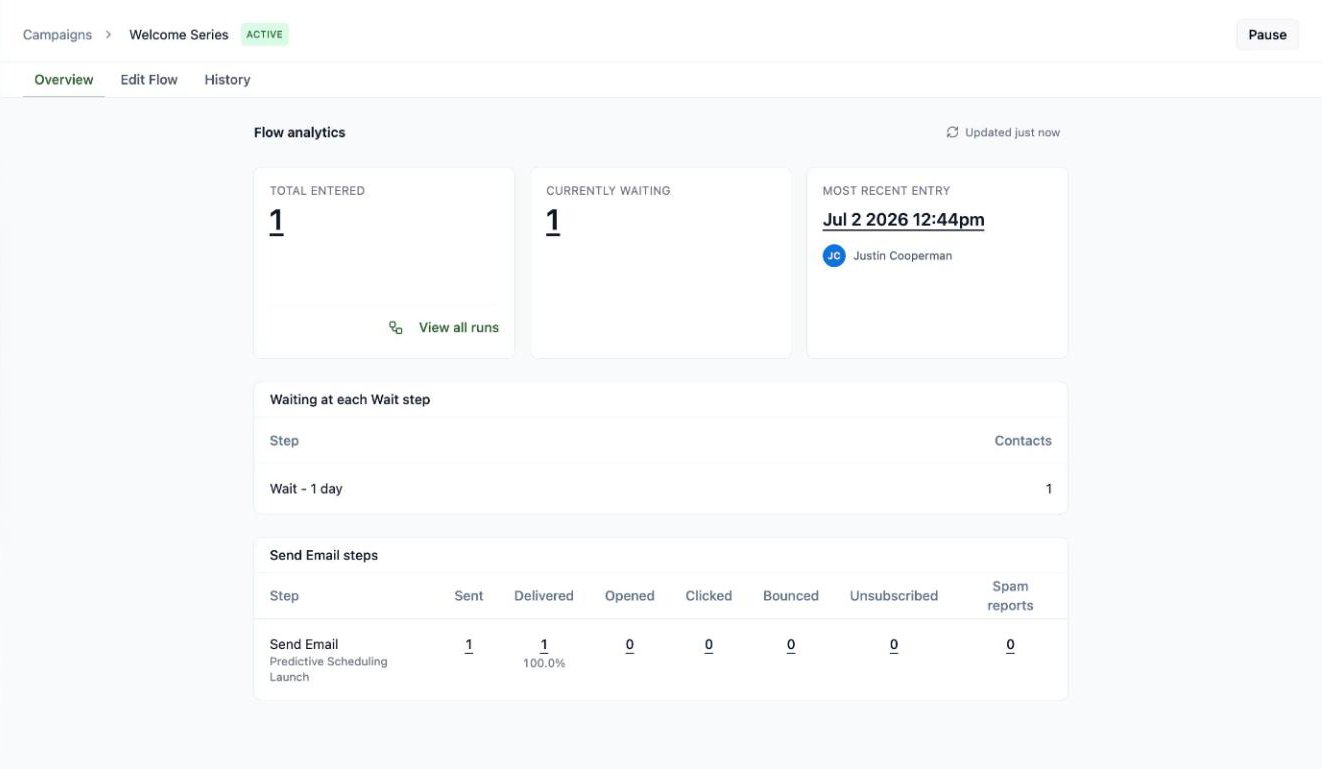
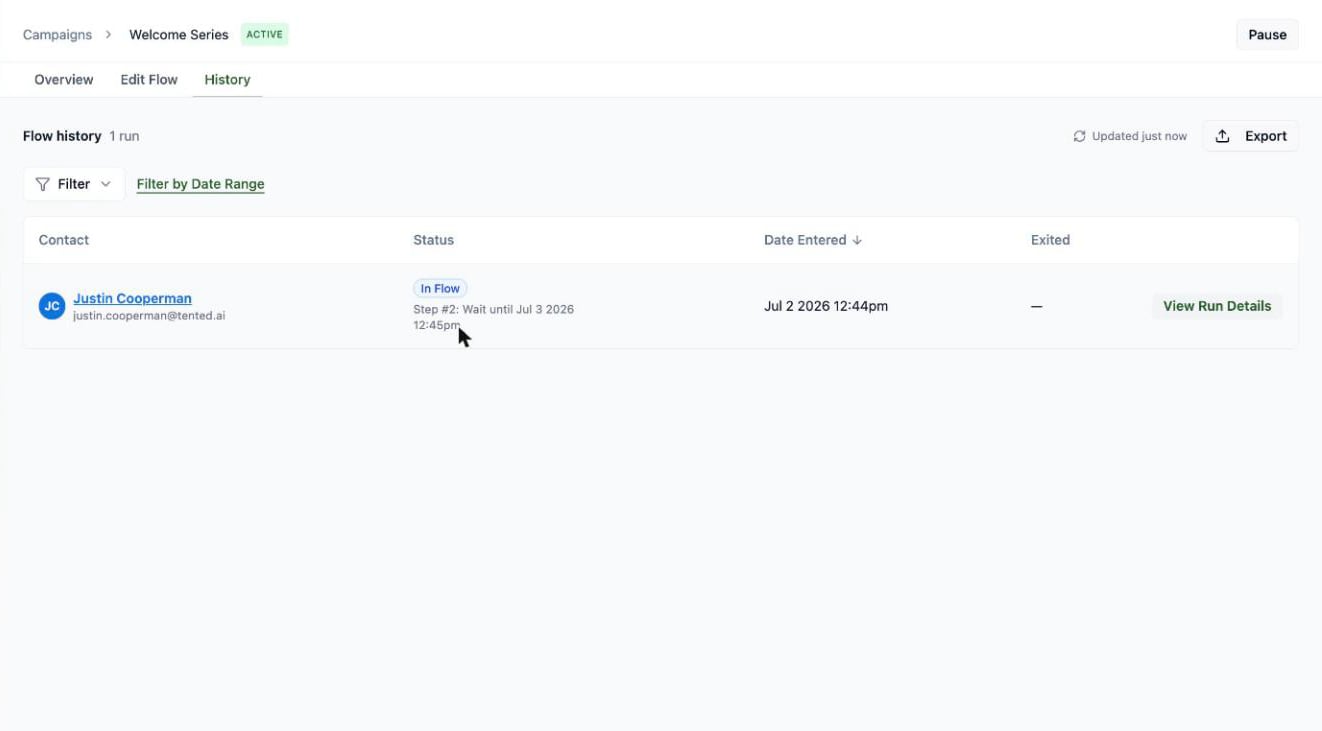
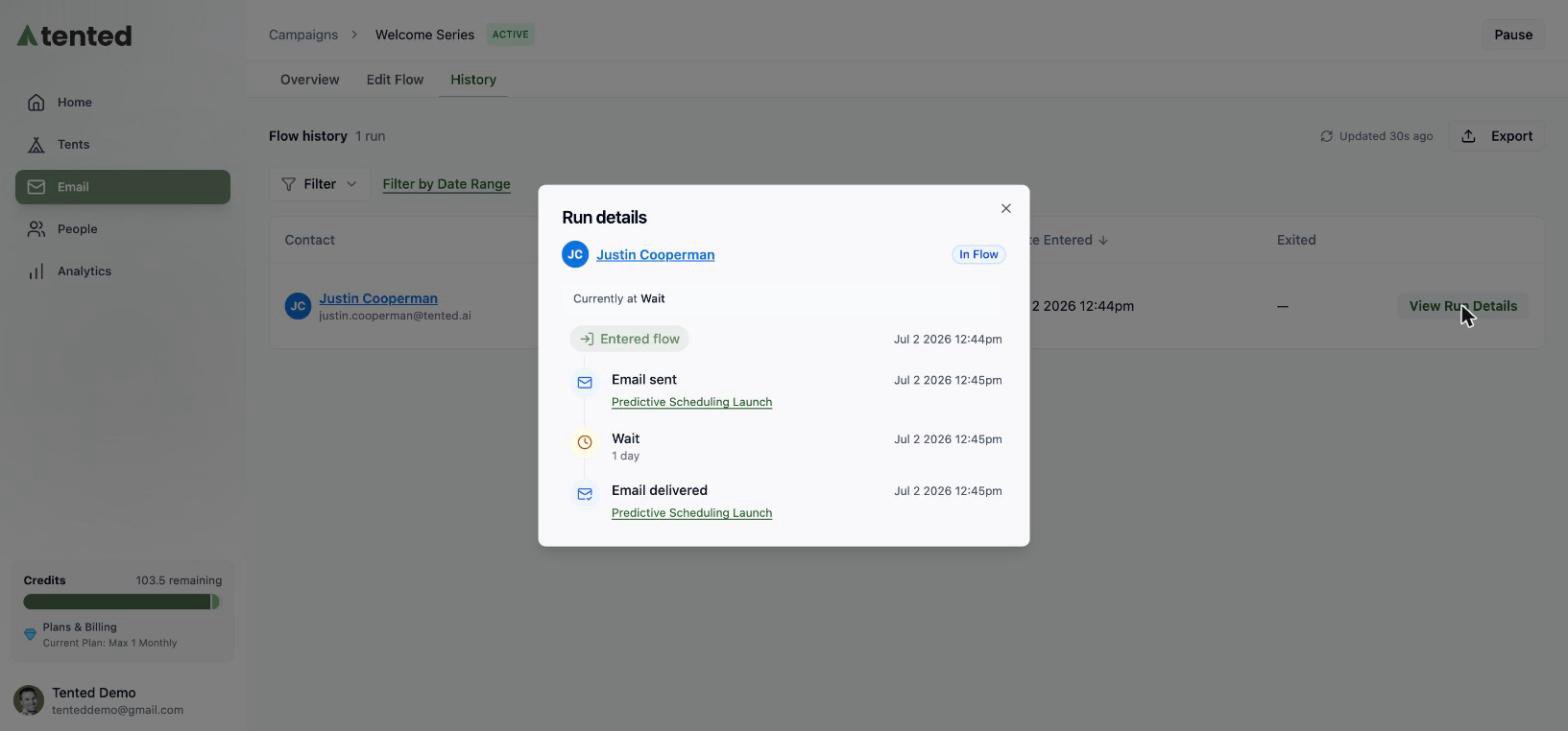
See every run
The History tab lists every contact who’s been through the flow — their status (In Flow, Completed, Exited), when they entered, and when they left. Filter by status or date range, and click Export for a CSV.