Why templates?
Built a tent whose layout and style you’ll want again — a webinar registration page, a product waitlist, a case-study layout? Save it as a template and every new tent can start from that design instead of a blank page. Great for keeping a consistent look across campaigns, or handing your team a proven starting point. Templates live under Tents > Templates.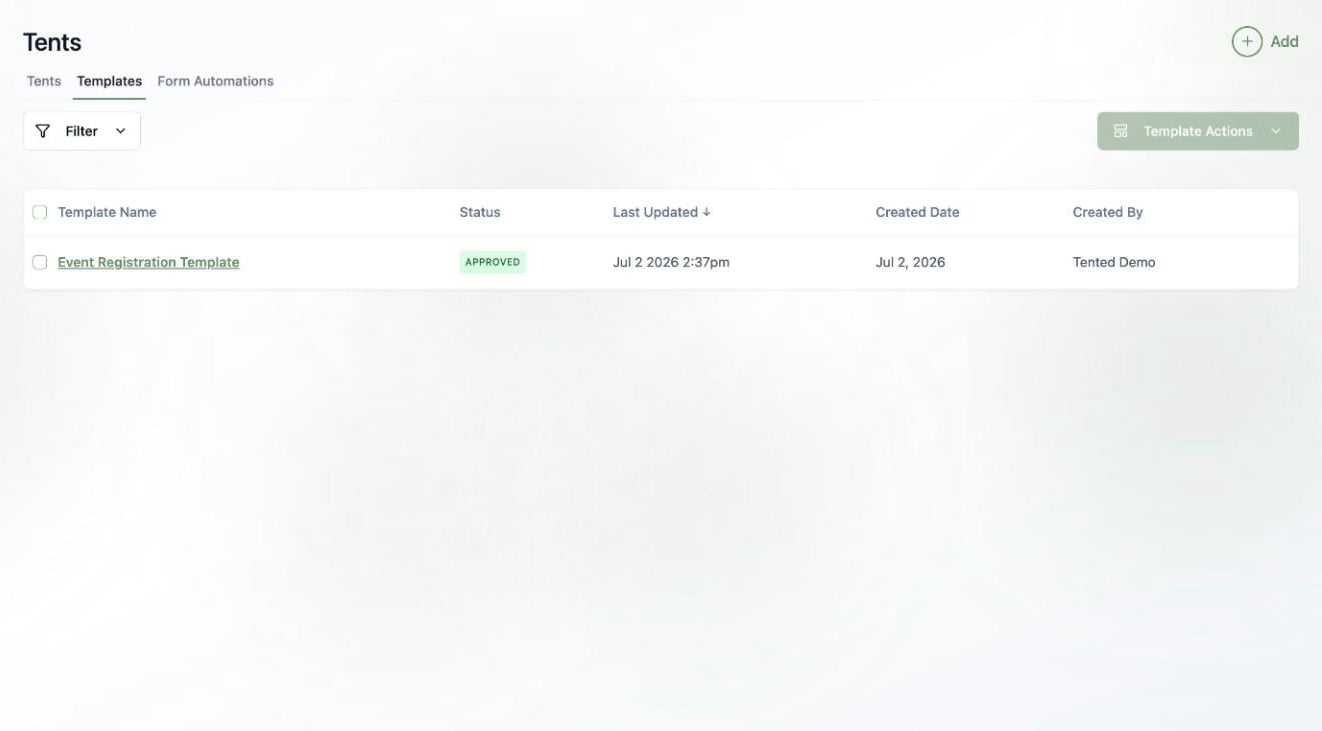
Creating a template
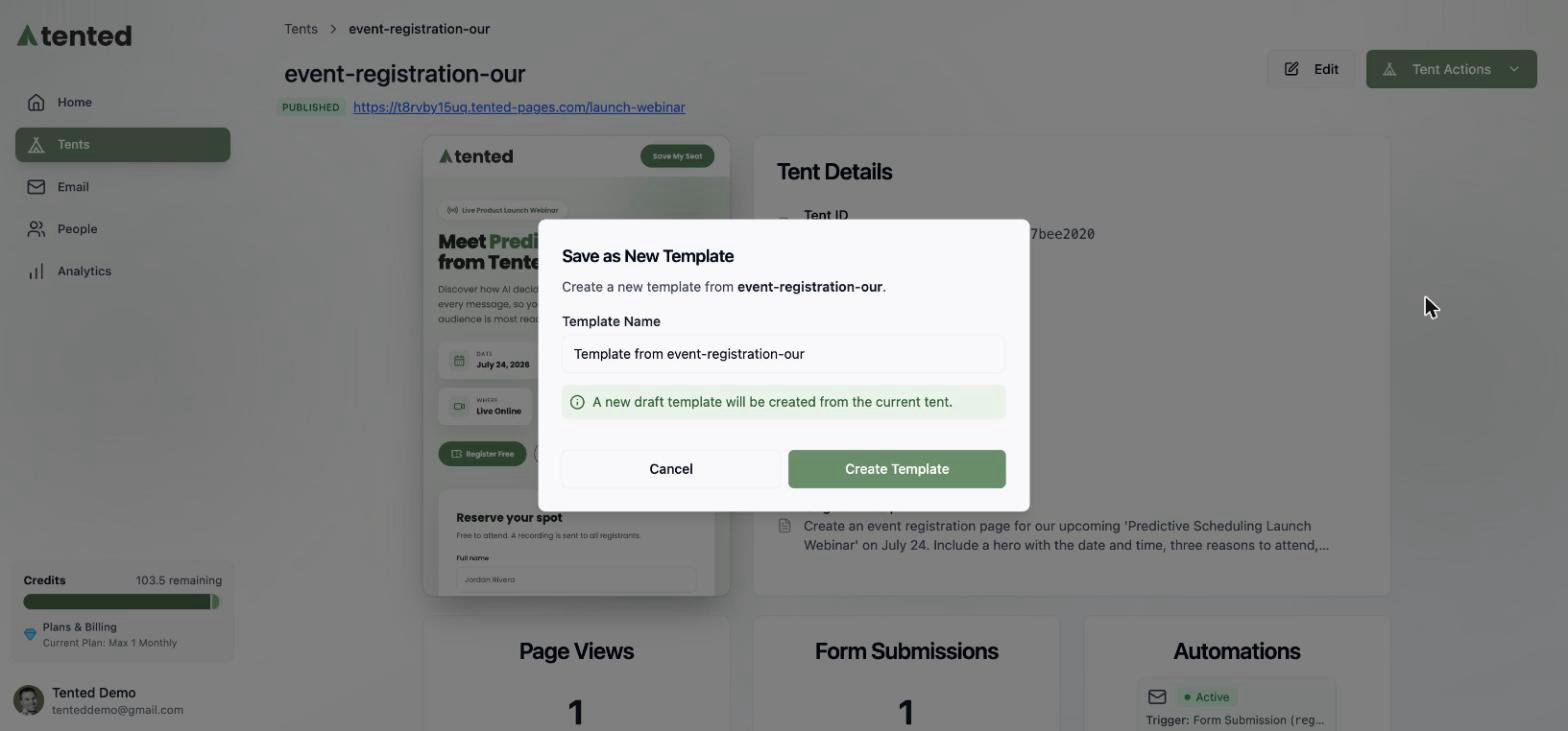
The easiest way is to save an existing tent:- Open the tent’s Tent Details page.
- Choose Tent Actions > Save as New Template.
- Name it and click Create Template.
Editing and approving
A template opens in the same editor as a tent: chat to refine it, or edit the code directly.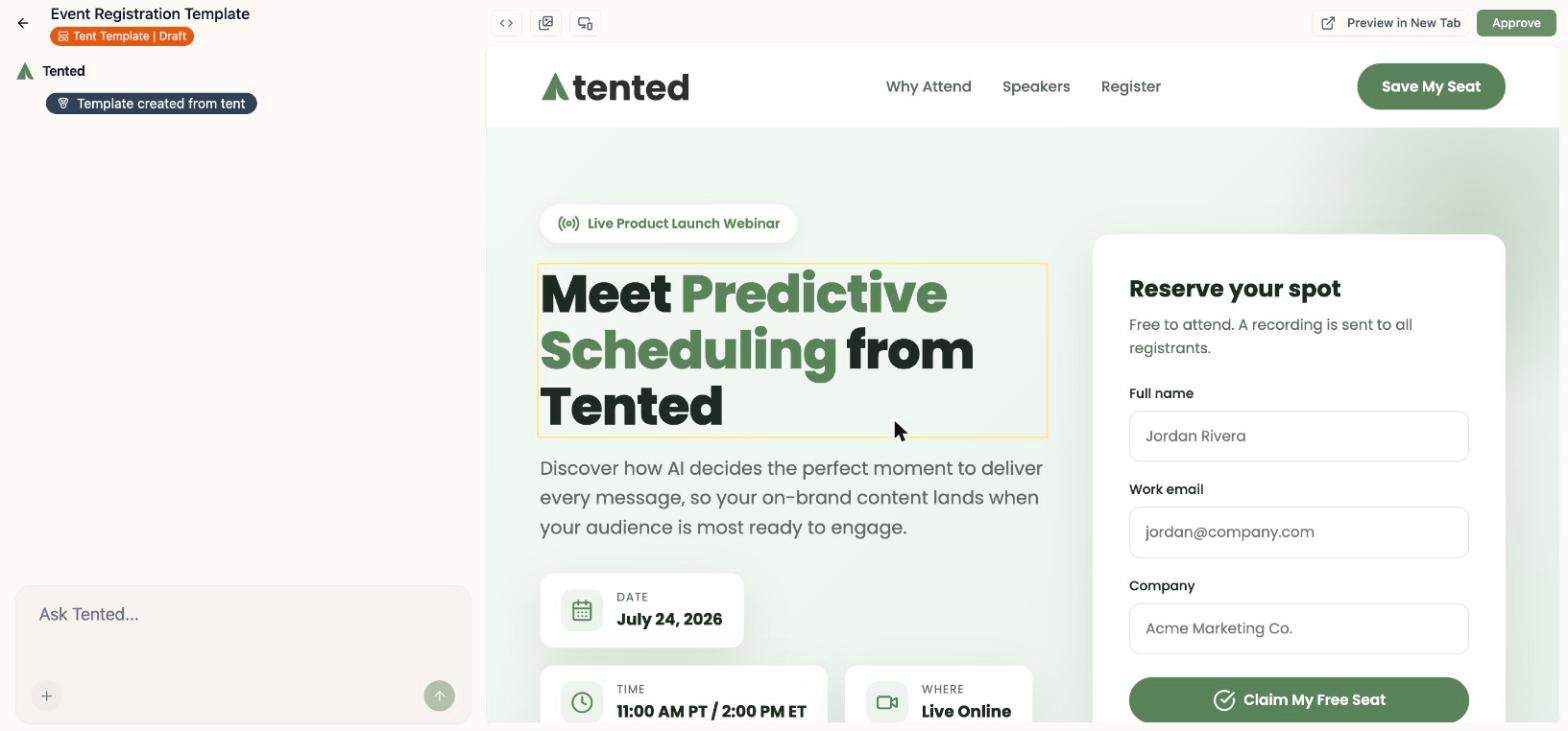
Using a template
When you create a tent (Tents > Add > Create Tent, or + Add from anywhere), the Template dropdown lists your approved templates. Pick one and your new tent starts from that design — then customize it with chat, leaving the template untouched.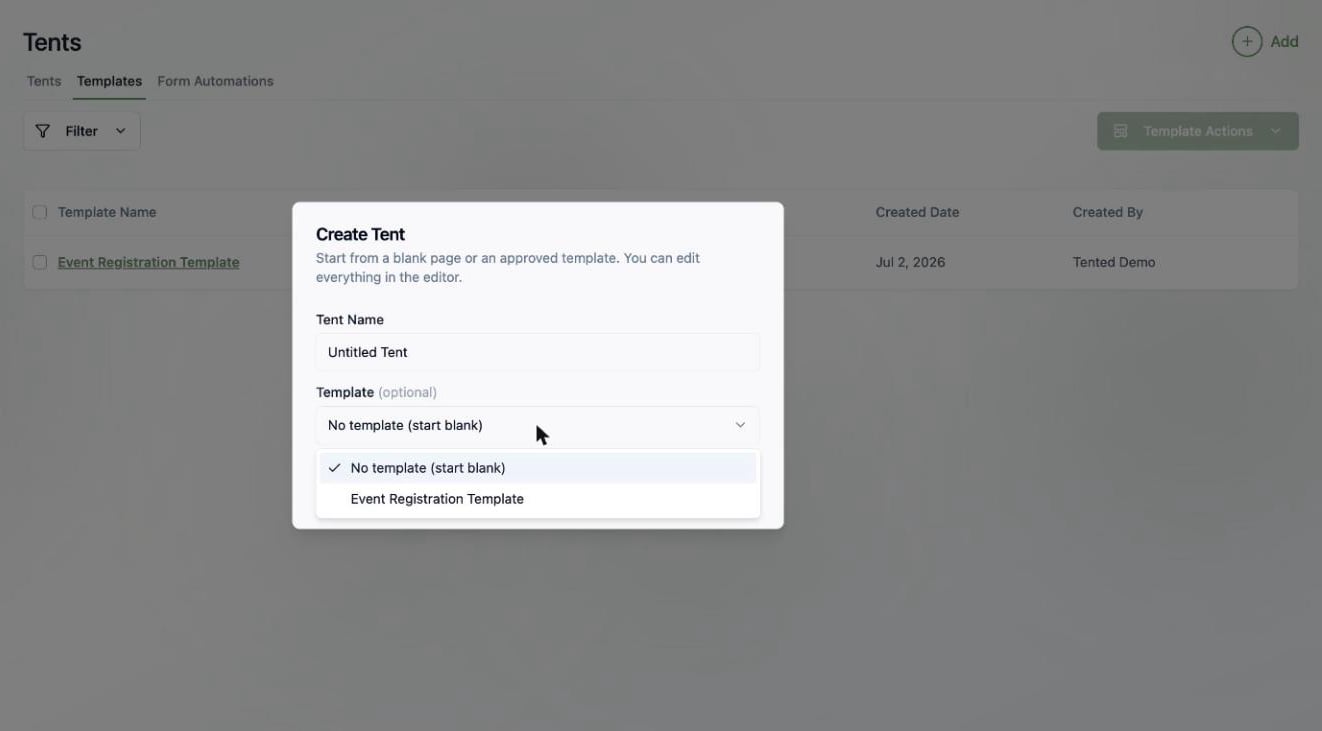
Next: Editing Tents
Master the chat-based editing workflow.