How it works
Clay tables can’t be read or updated from outside on most plans, so Tented never calls Clay. Instead Clay calls Tented:- A new row appears in your table (or a row’s data changes, if the column auto-updates).
- Clay’s HTTP API column sends the row’s fields to your Tented endpoint.
- Tented answers immediately with the page’s URL and a ready-made sentence that introduces it, then builds and publishes the page in the background. The page is live within a couple of minutes.
Prerequisites
Before you begin, make sure you have:- Admin access to your Tented workspace. Connecting, changing settings, and disconnecting are admin-only.
- An approved tent template in Tented. Pages are generated from a template’s approved version. See Templates if you don’t have one yet.
- A Clay plan with the HTTP API enrichment. Clay offers HTTP API on its Growth plan and above (it shows as an upgrade on the free plan).
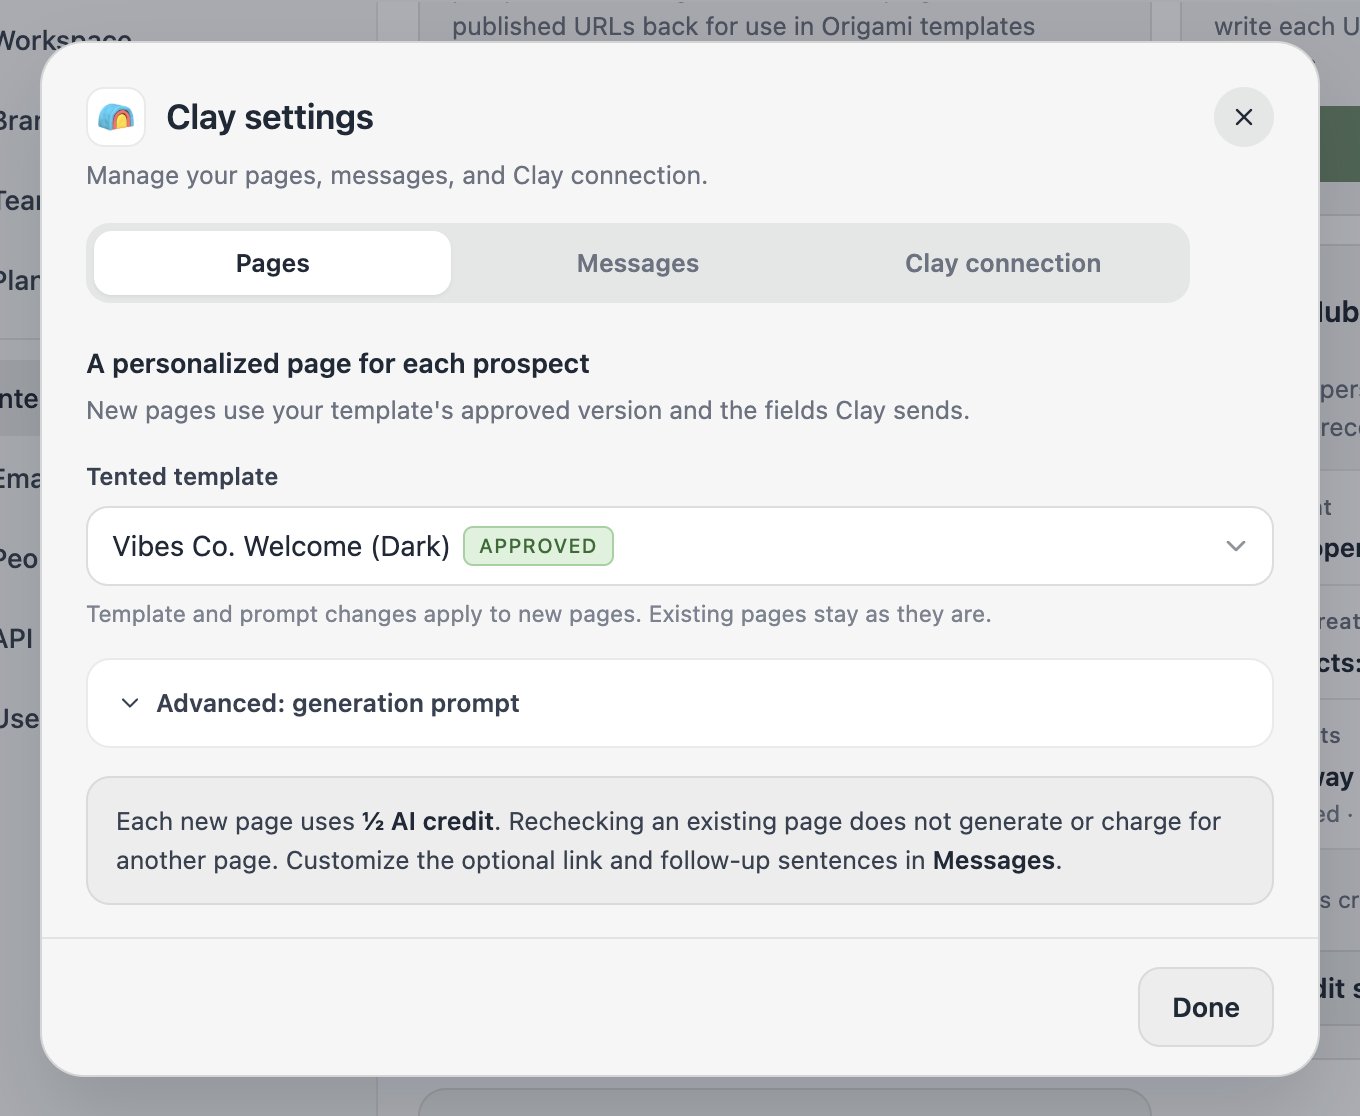
- AI credits. Each generated page uses half a credit.
Step 1: Connect Clay in Tented
- In Tented, open Settings → Integrations.
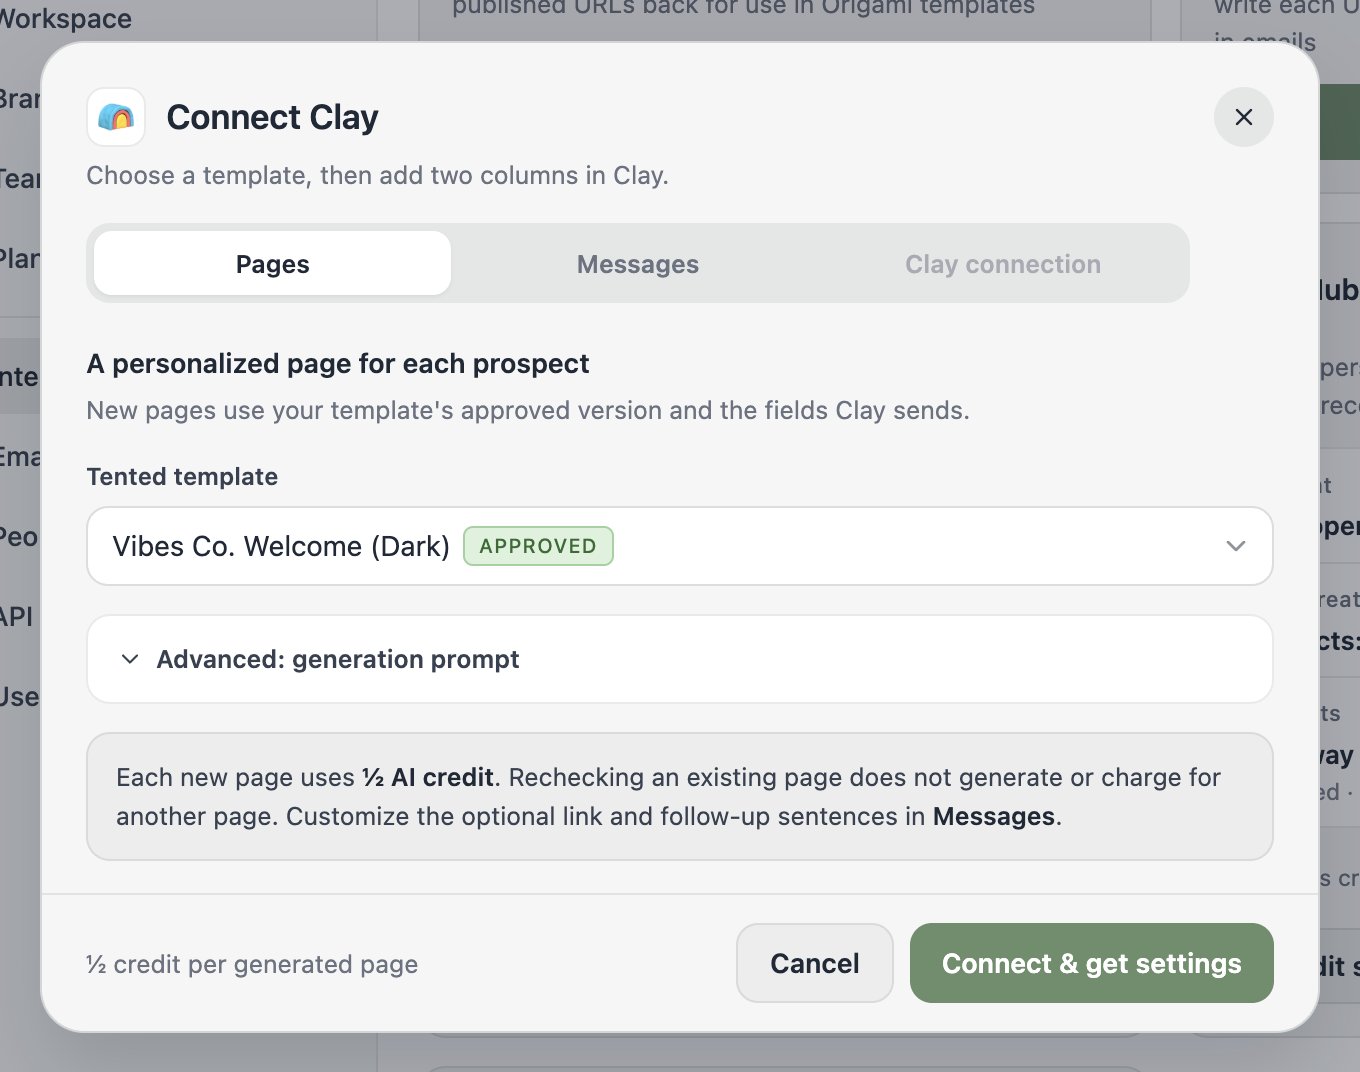
- On the Clay tile, select Connect.
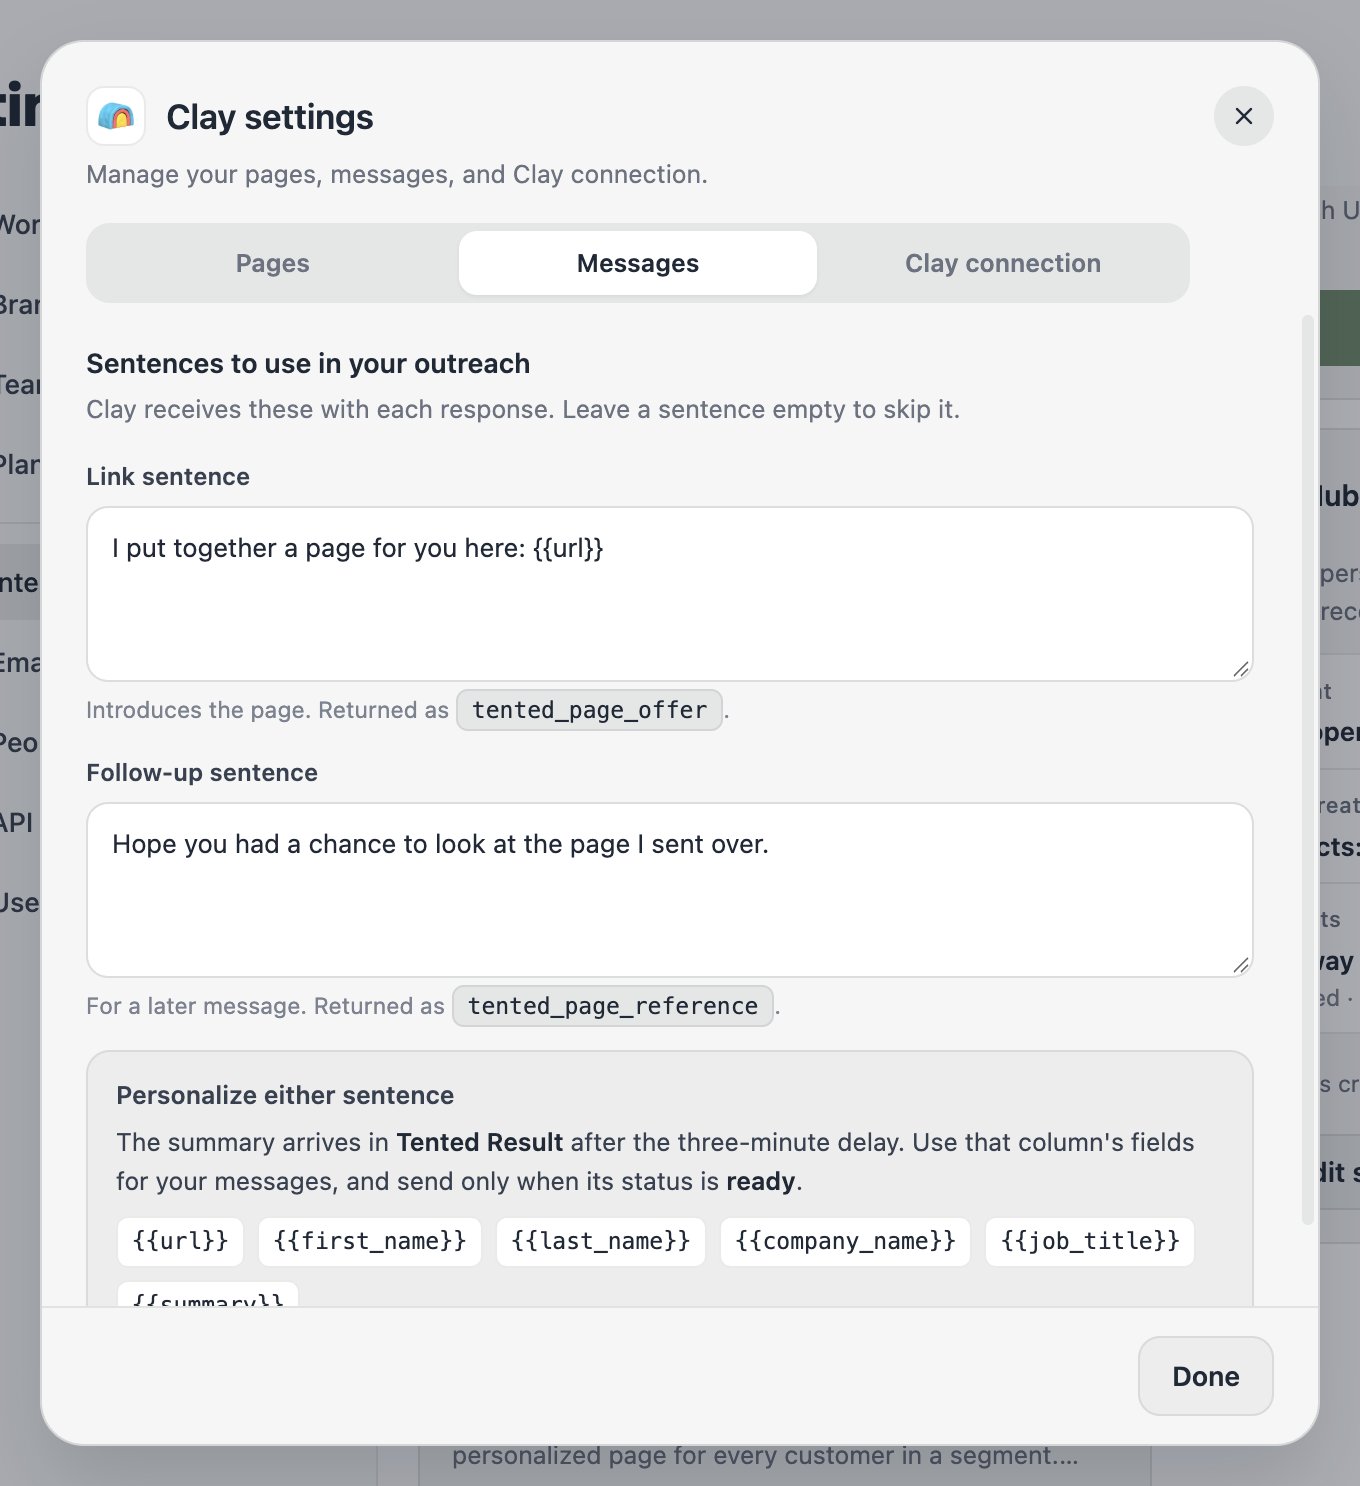
- Pick the Tented template each page starts from and, if you like, edit the Link sentence, the sentence Tented returns to Clay with the URL filled in (for example
I put together a page for you here: {{url}}). You can use{{url}},{{first_name}},{{company_name}},{{job_title}}, and{{summary}}.
- Under Advanced you can also change the tent generation prompt (
{{clay.rowData}}is replaced with the row’s fields) and the Follow-up sentence returned for later steps.
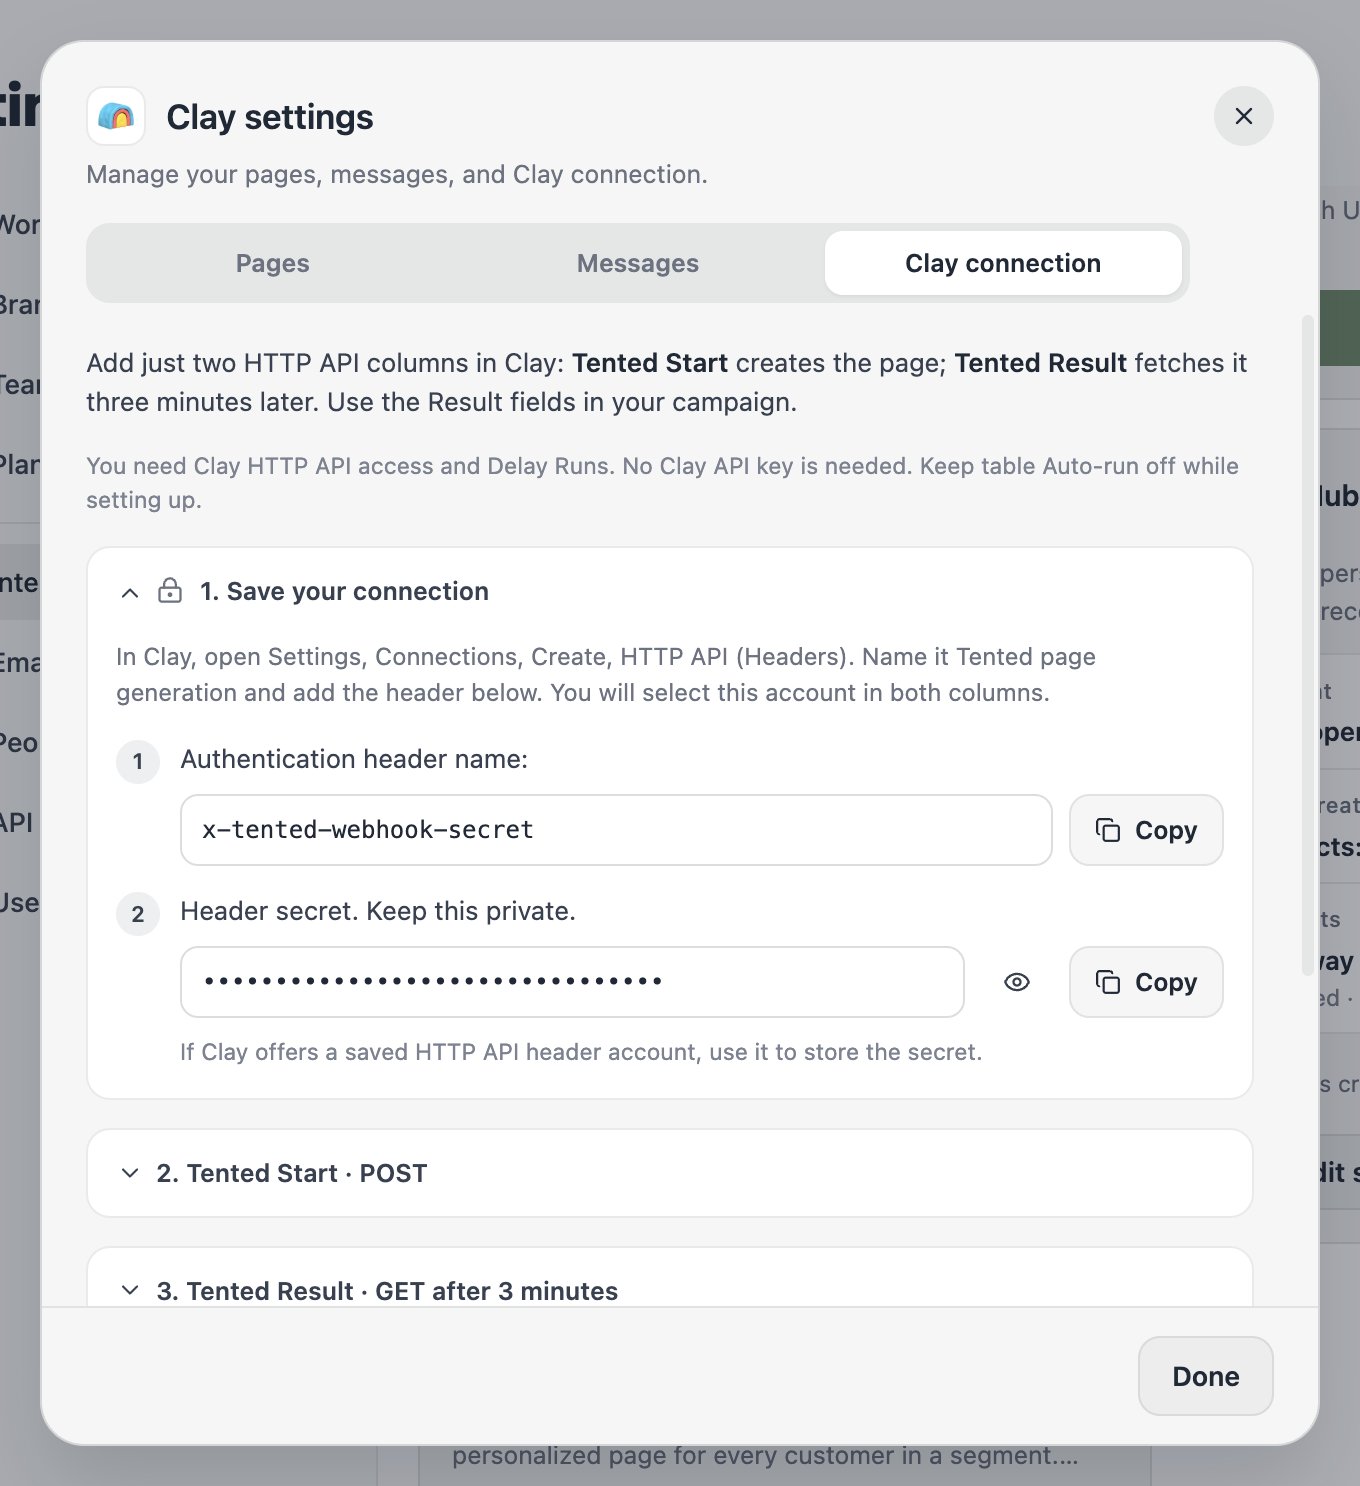
- Select Connect. Tented shows the column settings for Clay: the endpoint URL, the header secret, the JSON body, and the response fields, each with a copy button.
Each page uses half an AI credit. If your workspace runs out of credits, the integration pauses and resumes on its own once credits are available again.
Step 2: Add the Tented column in Clay
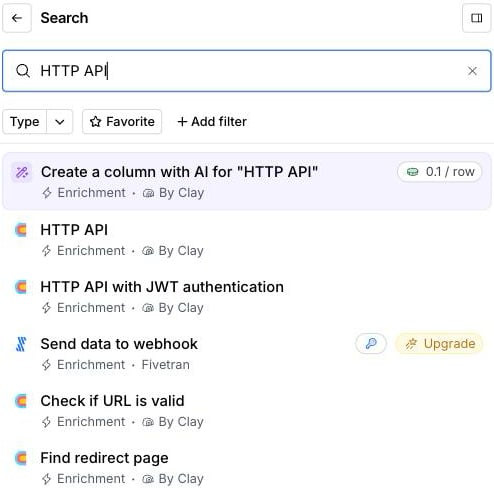
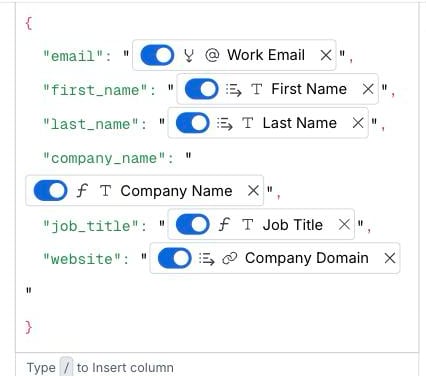
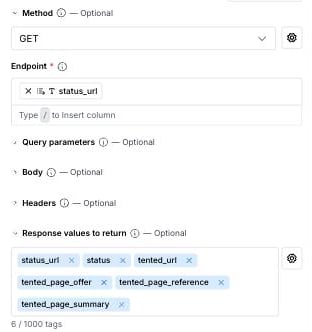
In the Clay table you want to enrich, select Add column → Add enrichment, search for HTTP API, and pick the HTTP API enrichment by Clay. The panel opens on a Generate tab that asks an AI to set the call up; switch to the Configure tab instead and fill in the setup inputs with the values Tented shows (each has a copy button):/ and pick the column from the menu Clay opens (for example your Work Email column for email). Each pick becomes a column chip inside the quotes. A value that stays plain text is sent as text, so a pasted "/Work Email" would not work.
email is required; it is how Tented recognizes a row it has already seen. Add any other columns the page should know about (industry, LinkedIn URL, notes) as extra keys: everything in the body is given to the page generator.
Under Headers, select Add a new Key and Value pair and enter x-tented-webhook-secret as the key and the secret from Tented as the value. Under Response values to return, add the response fields you want as columns, one per tag:
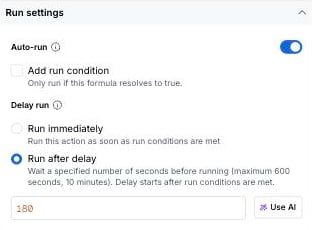
Under Run settings, leave Auto-run on so new rows and rows whose input columns change are sent to Tented; Tented answers with the same URL for a row it has seen (and, once the page exists, the summary and
ready).
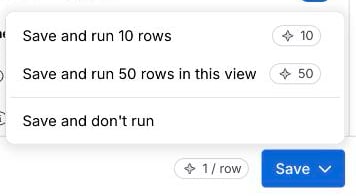
To finish, open the arrow next to Save and choose Save and don’t run, so you can try one row before the whole table runs.
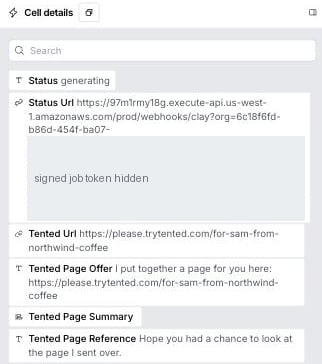
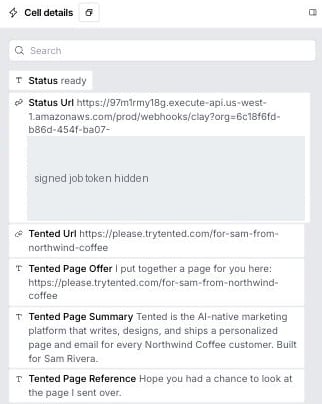
Hover the new column’s cell on one row and select its run button. Within a few seconds the cell shows Status Code: 200; select it to see what Tented returned: the page URL, the link sentence with the URL filled in, and generating as the status.
The Clay tile in Tented stops saying it is waiting for the first row and shows the sync. A minute or two later the page is live; run the same cell again and the status is ready, with the page summary filled in.
When you are happy with the result, run the column on the rest of the table (the column header’s Run column menu, or Save and run next time you edit it).
Using the link in a Clay campaign
Clay campaigns read the table at send time, and every synced column is available as a variable. In the campaign editor, insert thetented_page_offer column as a clean variable with a fallback of an empty value: rows whose page exists get the full sentence with the link, and a row without one gets nothing rather than a broken link. Use tented_url directly only where you are sure every lead has a page.
Because Tented returns the URL before the page is generated, a campaign that syncs a row right after the column runs still has the right link; the page is live long before Clay’s first send.
What happens after connecting
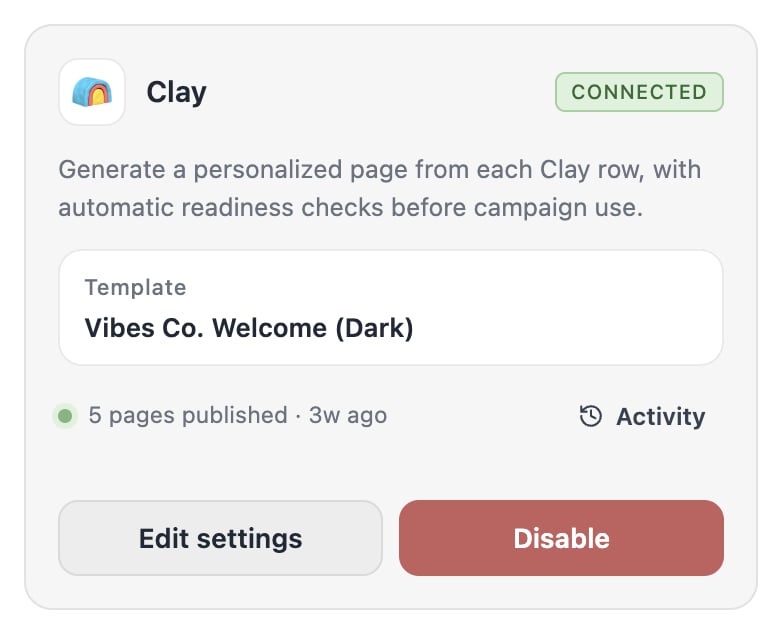
The Clay tile shows the template, the last sync, and a View activity link. Page URLs are readable. Each page publishes at a path built from the row’s name and company, for examplehttps://your-domain/for-bryan-from-acme-co. When a row has no company, the path uses the first and last name; without a first name, a short random path is used instead.
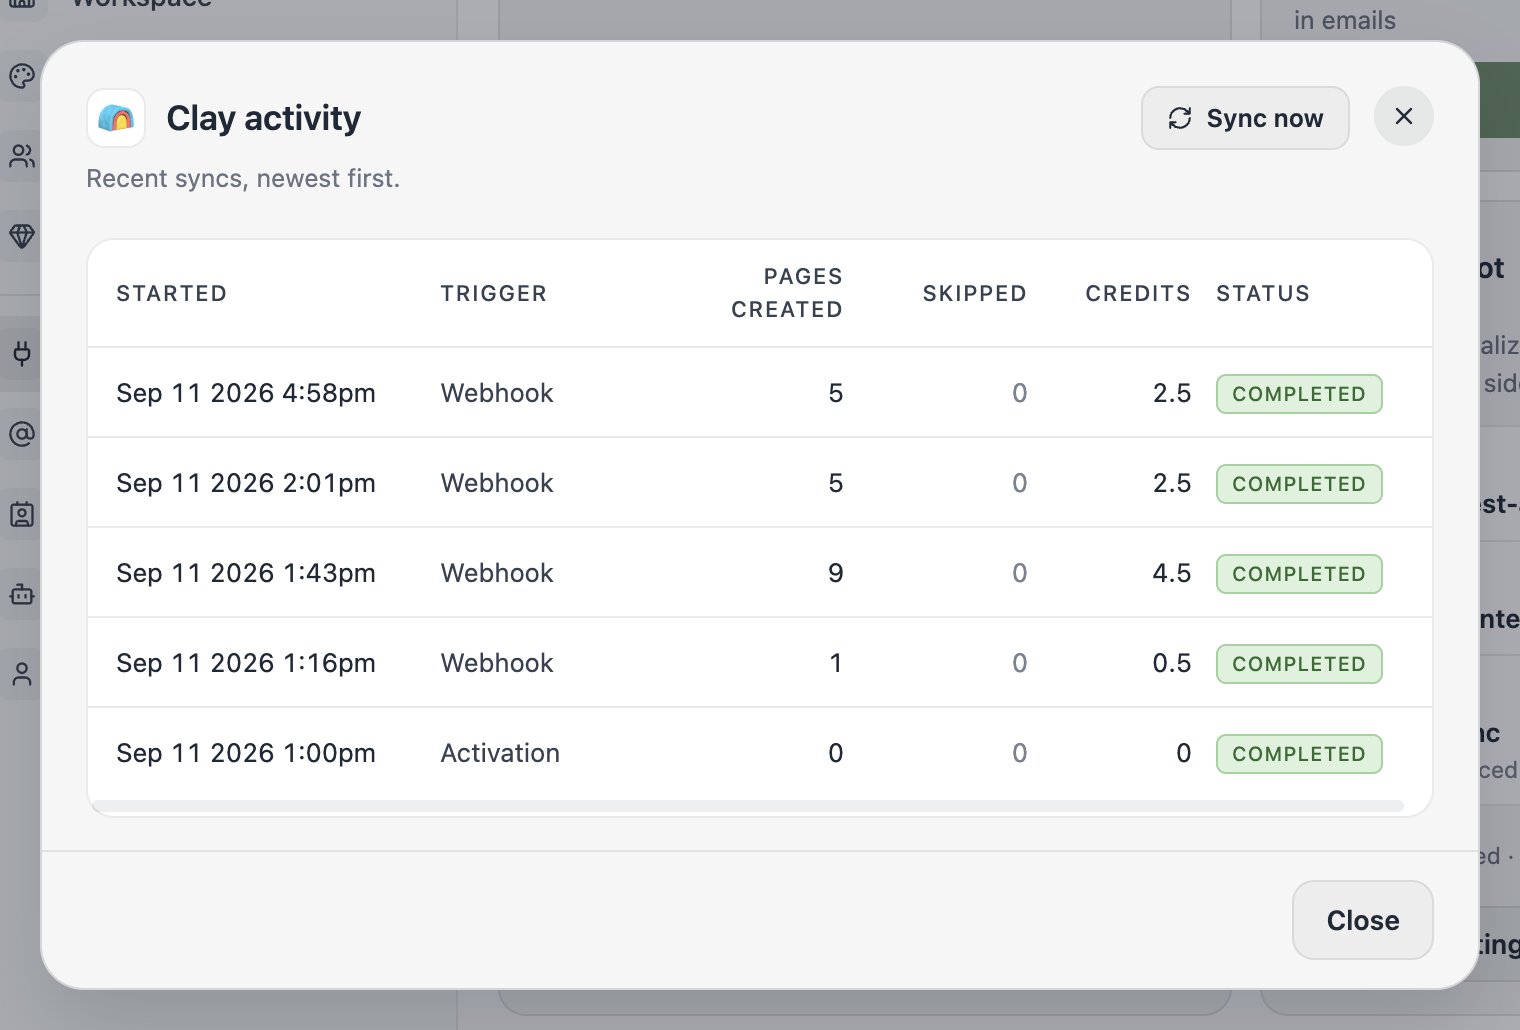
Activity lists each run with the pages published, rows skipped, and credits used.
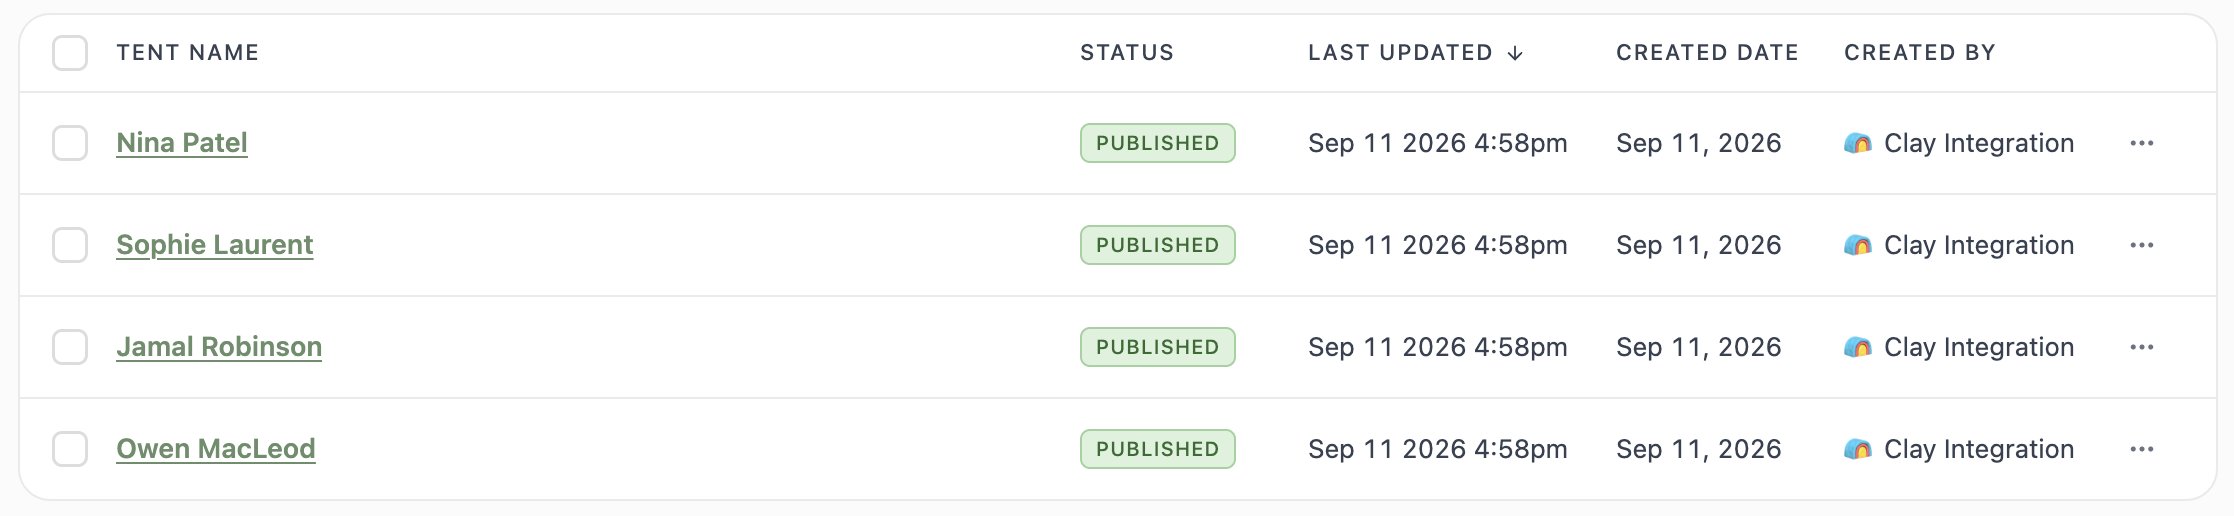
Generated tents appear in your Tents list with “Clay Integration” as the creator. Use Filter → Hide integration-created to keep them out of the way while you work on other tents.
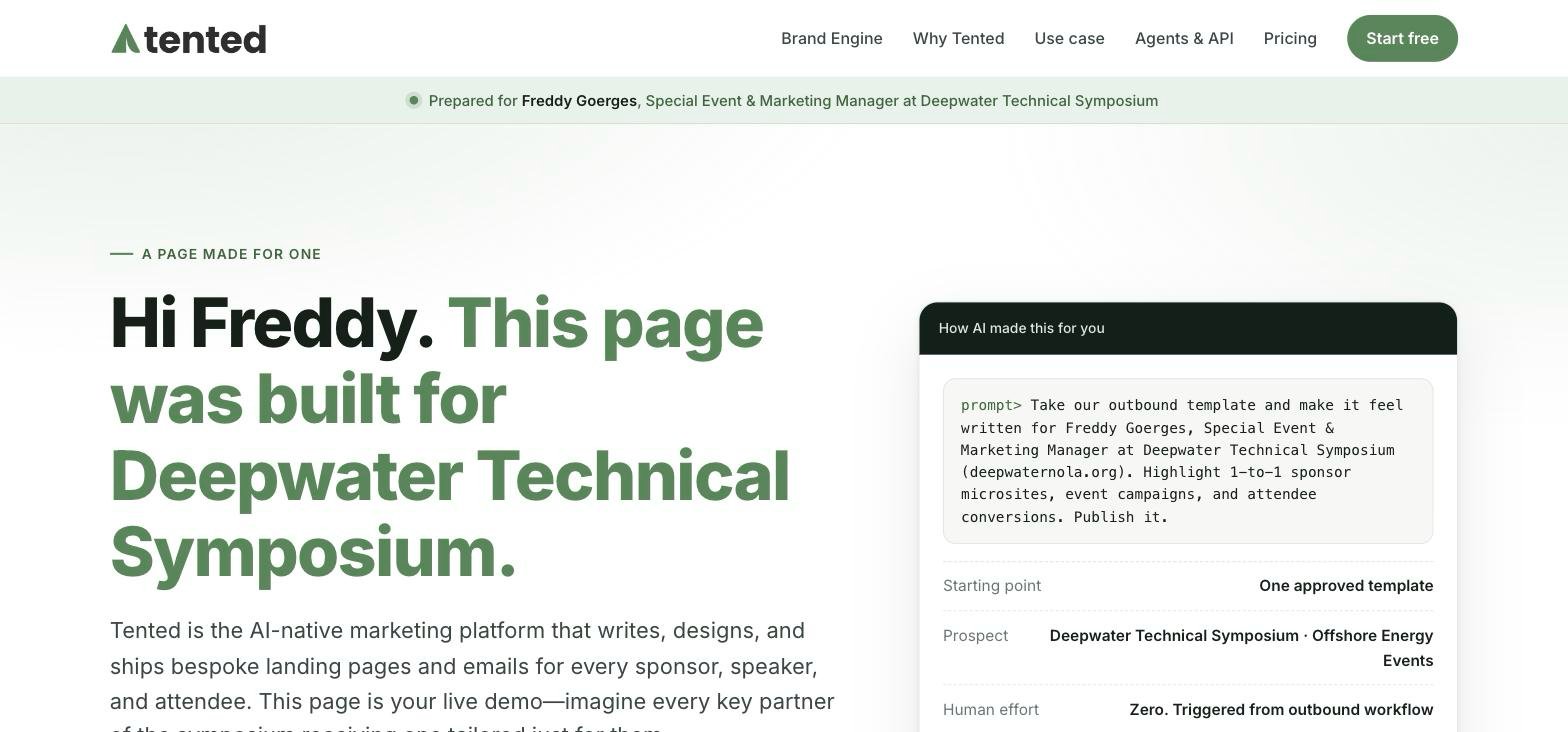
Each page is built from your template and the row’s fields, so the prospect sees their own name and company:
Re-runs never cost twice. Clay calling again for a row that already has a page, whether from Auto-update or a manual re-run, returns the existing URL. Changing a row’s data does not regenerate its page. The one exception is a row whose page could not be built: re-running that row starts a fresh attempt.
Every row is answered once. Two calls for the same email arriving at the same time get the same URL.