

Prerequisites
Before you begin, make sure you have:- Admin access to your Tented workspace. Connecting, changing settings, and disconnecting are admin-only.
- An approved tent template in Tented. Pages are generated from a template’s approved version. See Templates if you don’t have one yet.
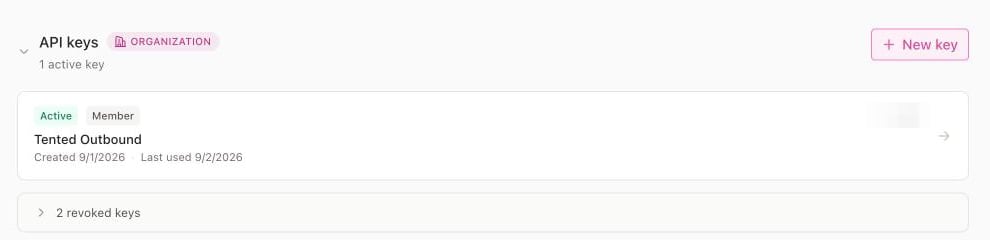
- An Origami API key. In Origami, go to Settings → Developers → API keys and create a key. A member key is fine.
- AI credits. Each generated page uses half a credit.
Step 1: Connect Origami
- In Tented, open Settings → Integrations.
- On the Origami tile, select Install.
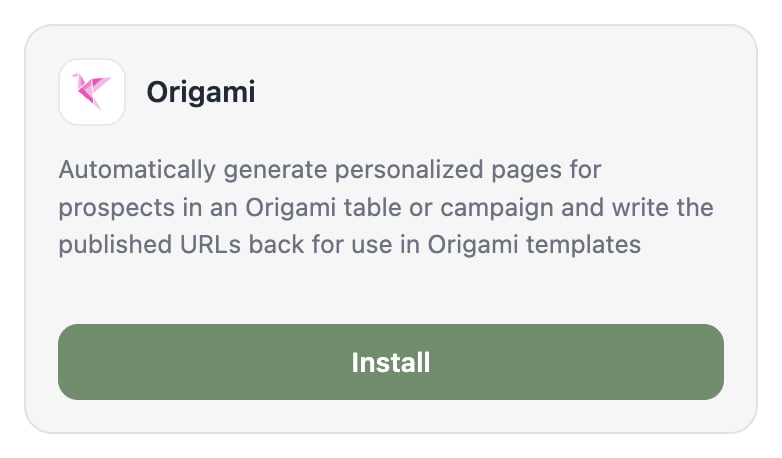
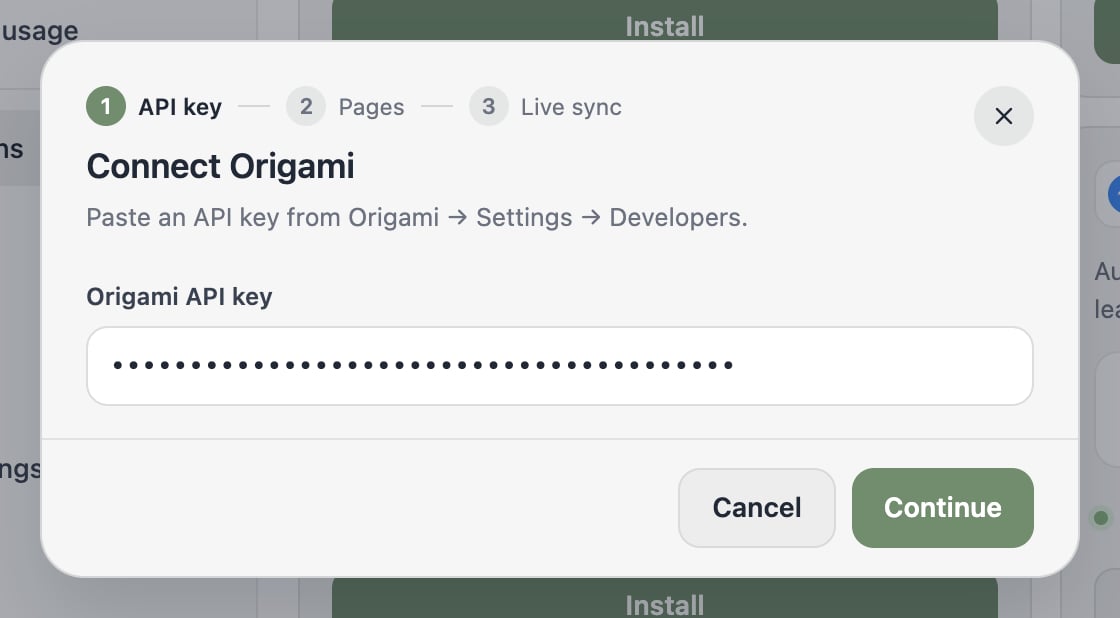
- Paste your Origami API key and select Continue. Tented checks the key with Origami before moving on.
Step 2: Choose what to generate
Pick the table to work from, the campaign to enroll into, and the template to build pages with.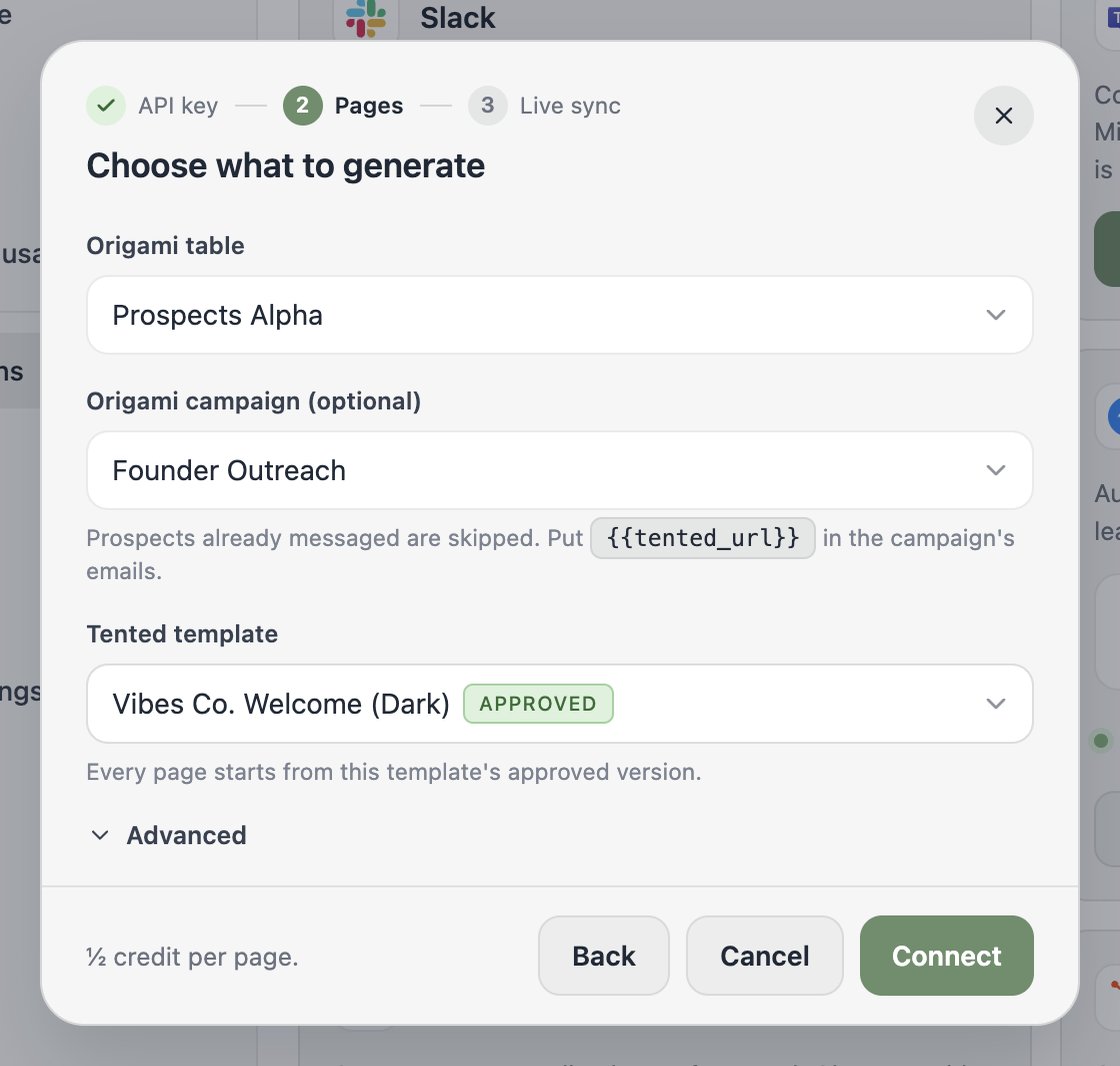
- Origami table: the lead table whose prospects should get pages. Tented adds two columns to it, Tented Personalized URL and Tented Page Summary, and fills them in as pages are published.
- Origami campaign (optional): the campaign to enroll prospects into once their page exists. Prospects the campaign has already messaged are skipped, so connecting to a running campaign never generates pages for people who already heard from you.
- Tented template: the approved template each page starts from. The page is personalized to the prospect’s company, role, and industry using the row’s data.
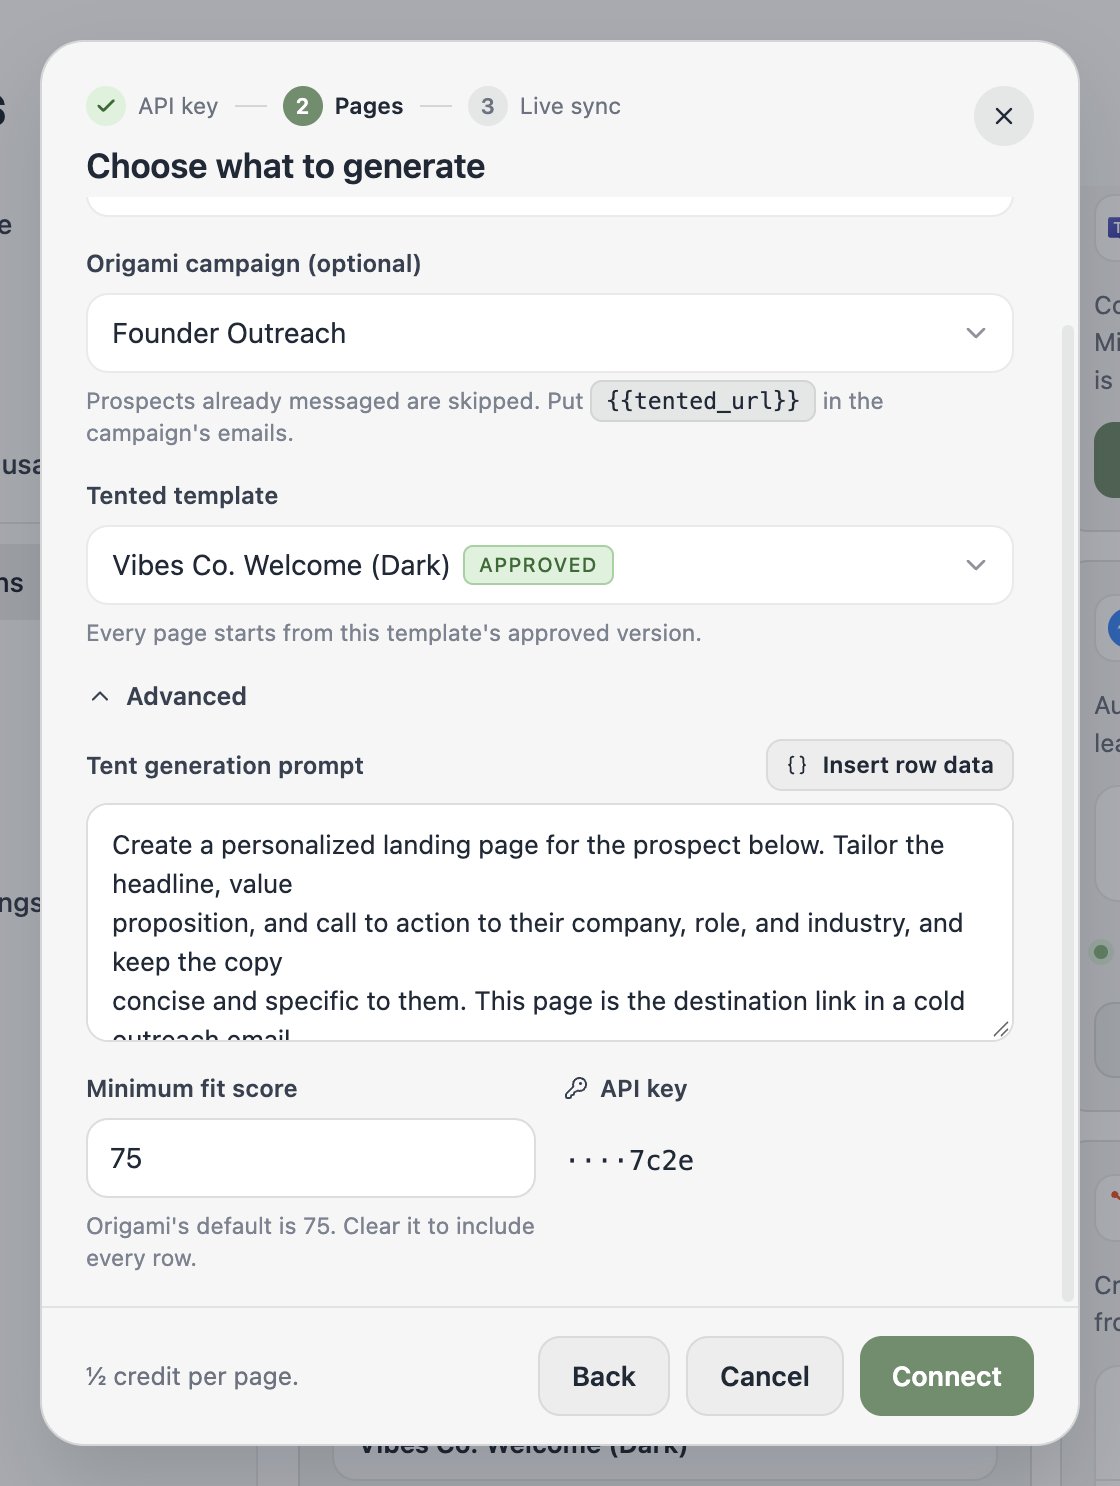
- Tent generation prompt: the instructions Tented gives the model for each page.
{{origami.rowData}}is replaced with the prospect’s row data; use Insert row data to place it. - Minimum fit score: only prospects Origami scored at or above this number get a page. The default is 75, which matches Origami’s own table view. Clear it to include every row.
Each page uses half an AI credit. If your workspace runs out of credits, the integration pauses and resumes on its own once credits are available again.
Step 3: Turn on live sync
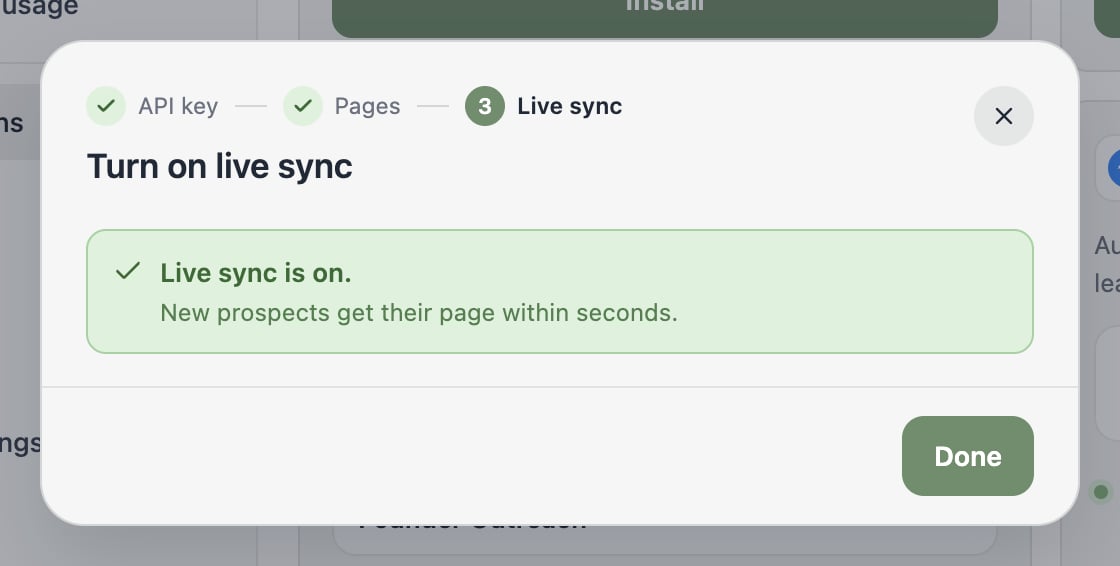
Without live sync, Tented checks the table for new prospects every 15 minutes. With live sync, Origami tells Tented the moment a table run completes, so new prospects get a page within seconds. If your API key is an admin key, Tented registers the webhook itself and this step shows Live sync is on. With a member key, Tented walks you through creating the endpoint in Origami: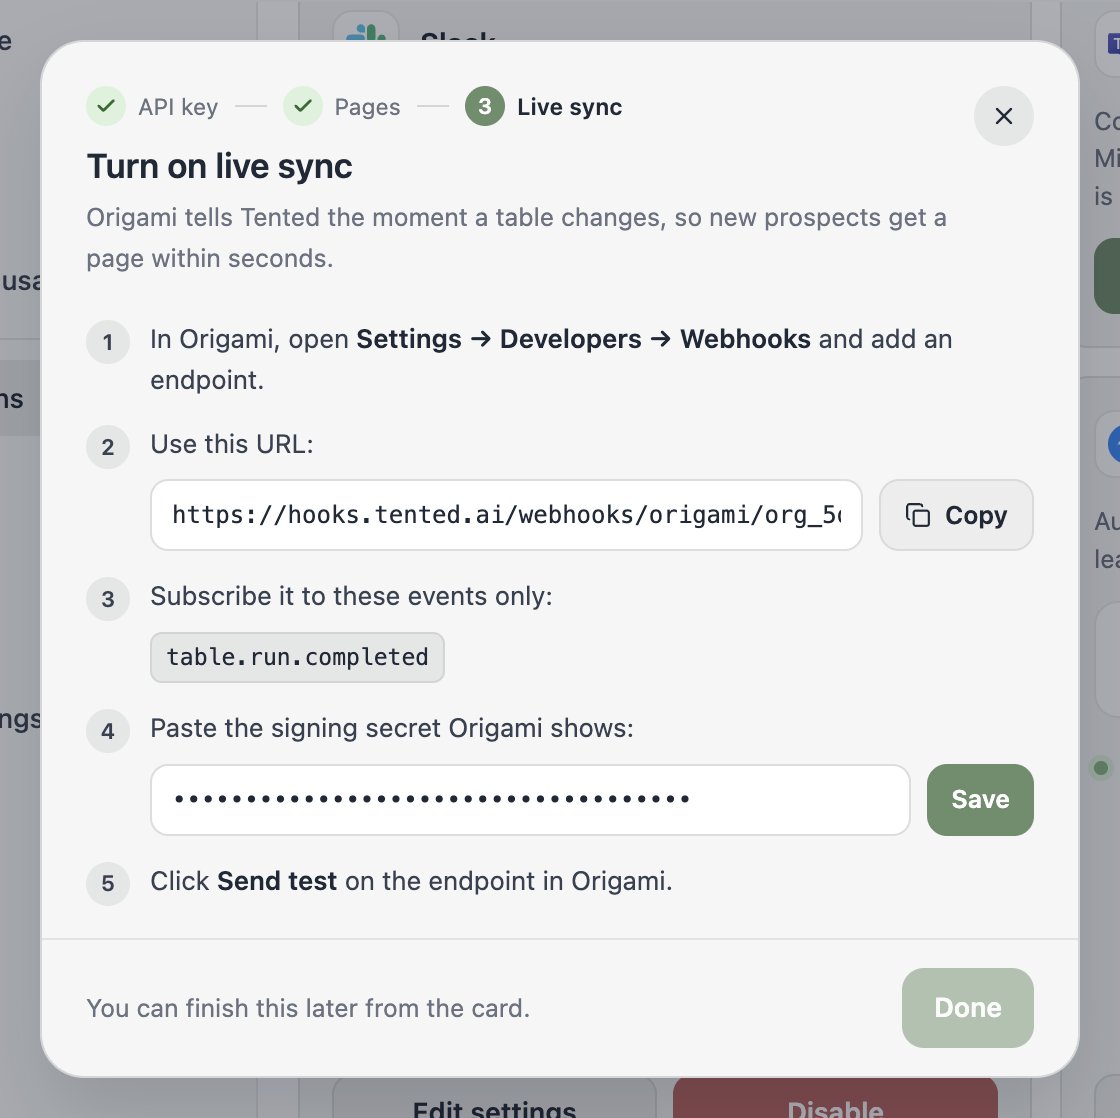
- In Origami, go to Settings → Developers → Webhooks and select New endpoint.
- Paste the endpoint URL shown in Tented (use the Copy button).
- Under Event types, check only
table.run.completed.
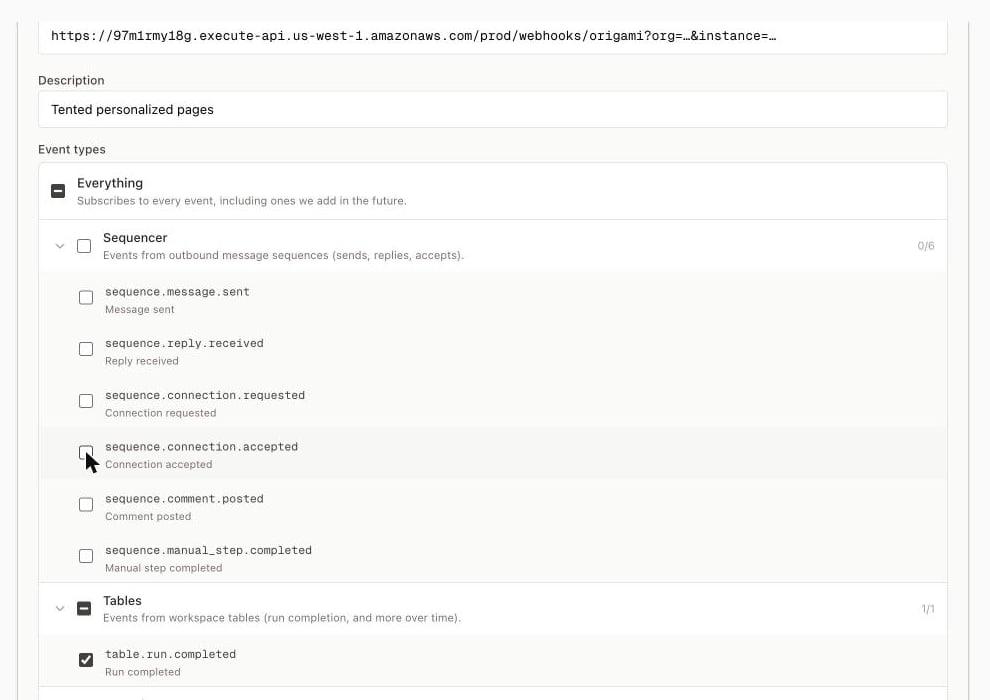
- Select Create endpoint. Origami shows the endpoint’s signing secret once. Copy it.
- Back in Tented, paste the secret and select Save. Tented now waits for a test delivery.
- In Origami, open the endpoint you just created and select Send test. Tented verifies the signature and the step changes to Live sync is on.
Using the link in your Origami campaign
When a campaign is selected, Tented adds two fields to that campaign’s person schema and fills them in for every prospect it enrolls:
Reference them in the campaign’s email template like any other person field, for example:
- Only add the link where it can’t be blank. Prospects the campaign already messaged never get a page, so put
{{tented_url}}in the first step, or instruct Origami’s writer to leave the sentence out when the field is empty. - Auto Lead Refill works with this. When Origami adds a prospect to the campaign on its own, Tented fills in their URL on its next sync and asks Origami to re-render any steps that haven’t been sent yet. To make sure the link exists before the first email goes out, give the first step a short delay or turn on Approve messages before sending in the campaign settings.
What happens after connecting
The Origami tile shows the connected table and campaign, the last sync, and a View activity link.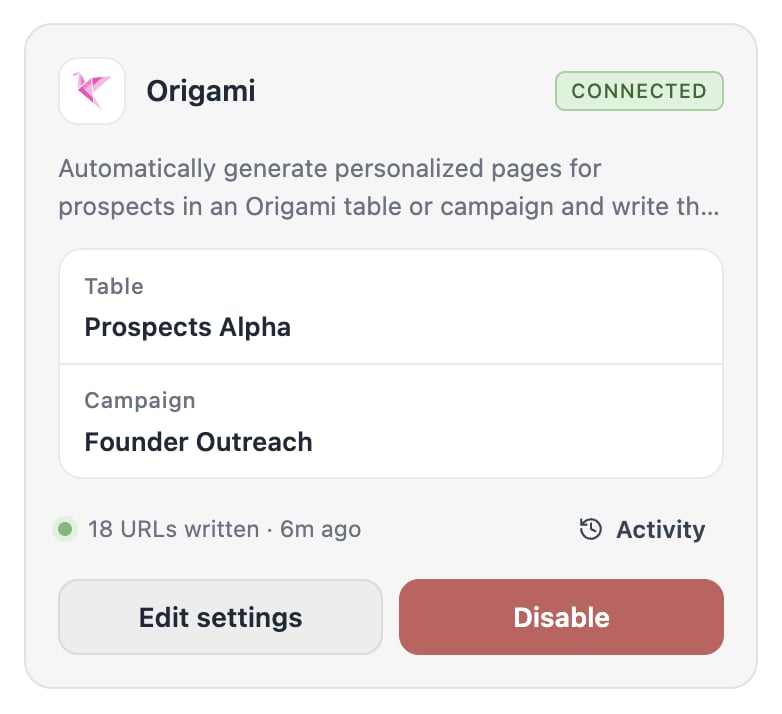
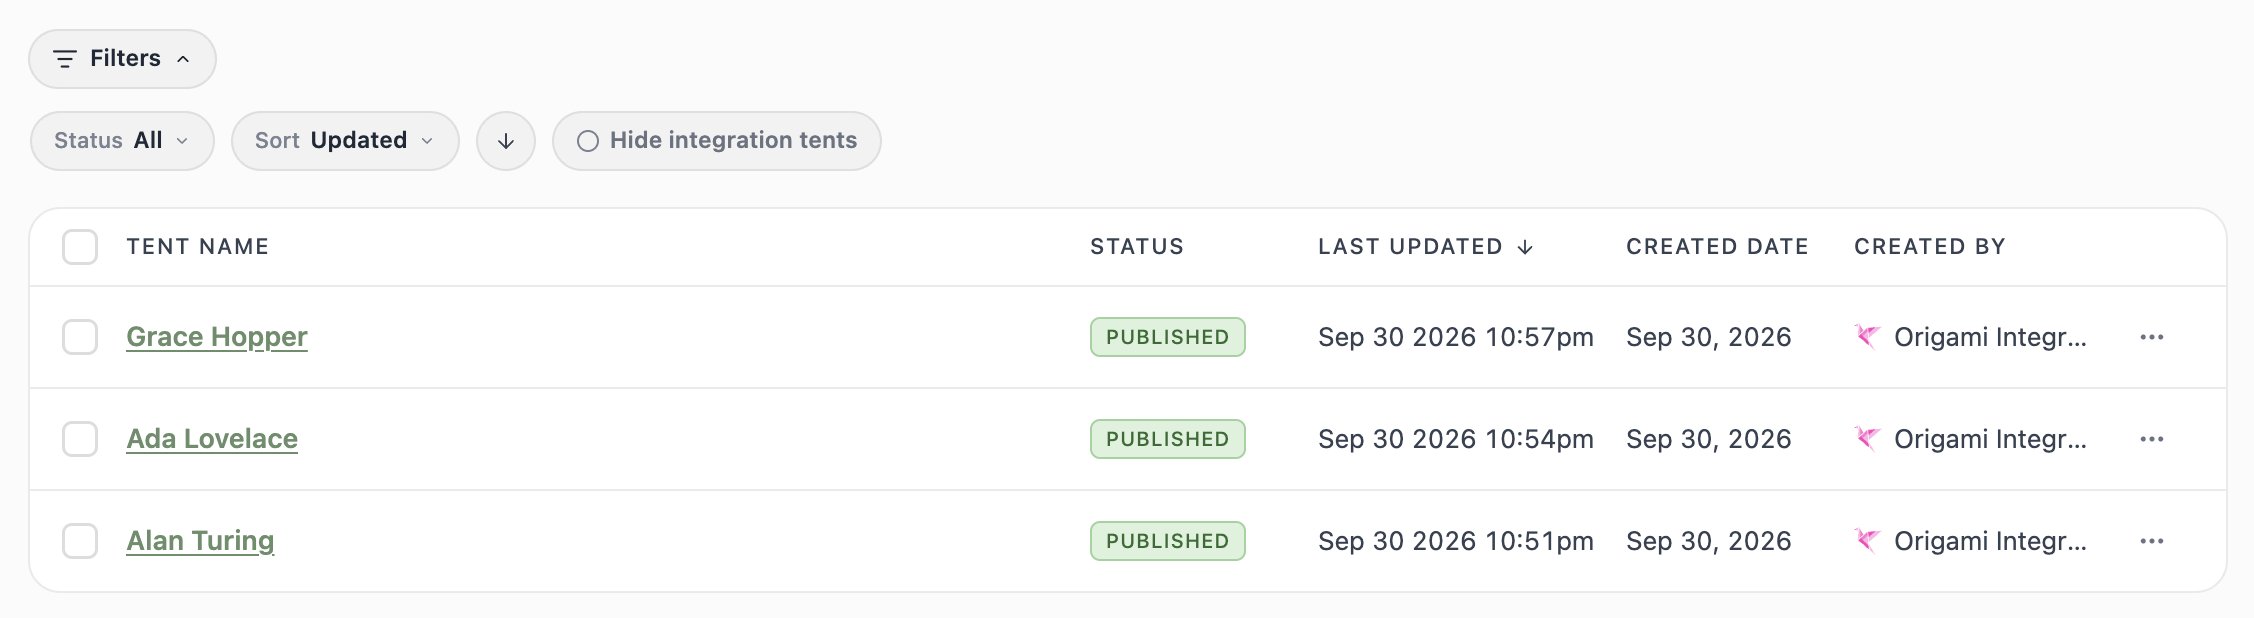
https://your-domain/for-bryan-from-acme-co. When a row has no company, the path uses the first and last name instead.
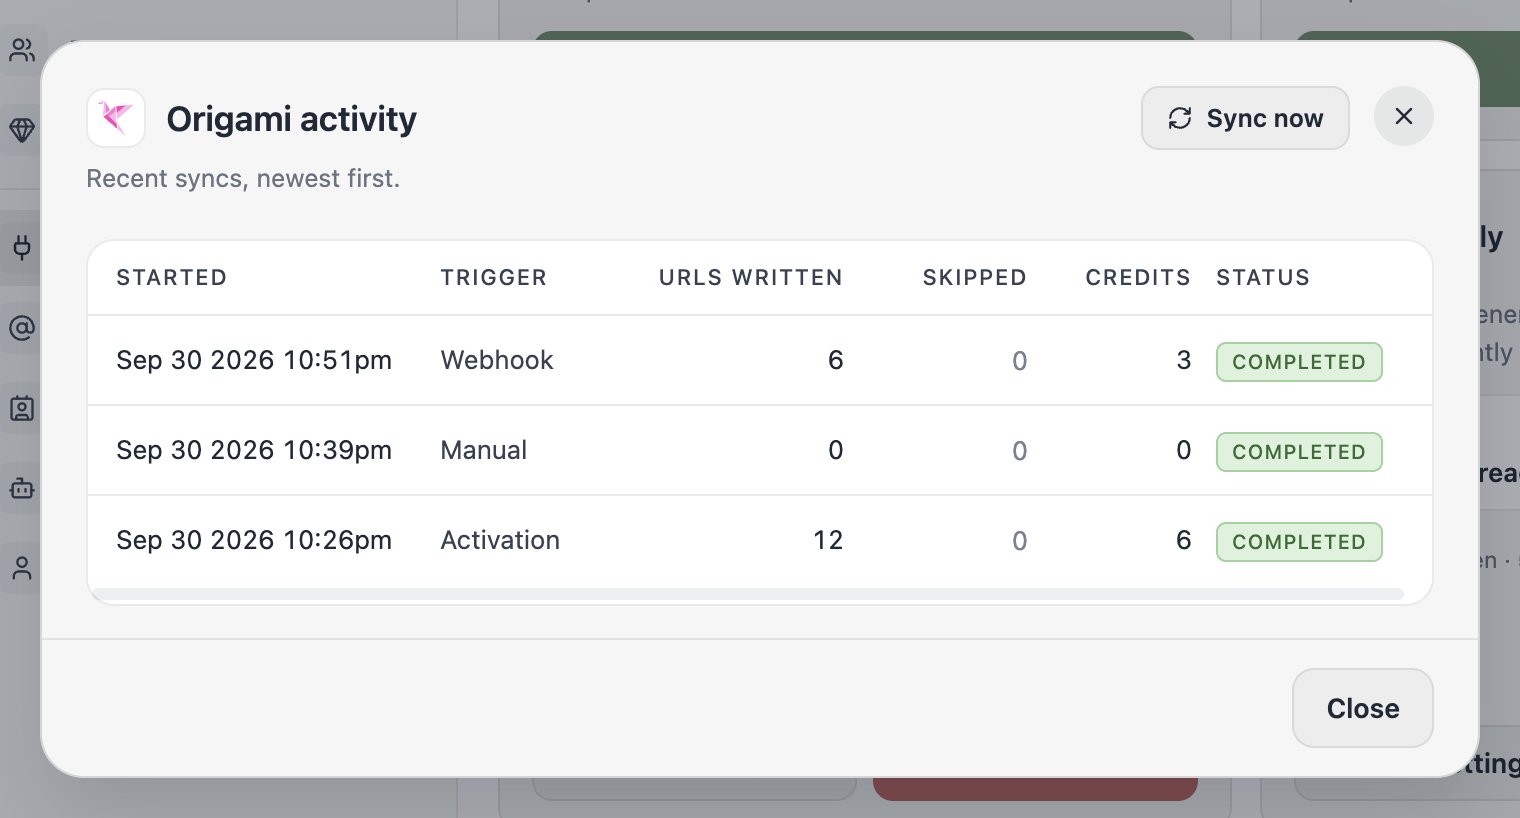
Activity lists each sync run with the URLs written, prospects skipped, and credits used. Select a skipped count to see which prospects were skipped and why. Sync now starts a run immediately.
Changing settings
Select Edit settings on the tile to change the table, campaign, template, prompt, or fit score. Changes apply to prospects that don’t have a page yet; existing pages and URLs are left alone. Switching campaigns never enrolls prospects who already have a URL into the new campaign. To use a different Origami API key, select Disable and connect again with the new key.Disconnecting
Select Disable on the Origami tile. Tented stops generating pages for new prospects and removes the webhook it registered. Pages already generated, and URLs already written to your table and campaign, are not deleted.Troubleshooting
Need help? Contact us at support@tented.ai.
Next: Setting Up Email Notifications
Learn how to set up email notifications for form submissions.