> ## Documentation Index
> Fetch the complete documentation index at: https://docs.tented.ai/llms.txt
> Use this file to discover all available pages before exploring further.
# Publishing Tents
> Publish your tent and make it live on the web
## Publishing Overview
Publishing your tent makes it available on the web with a unique URL that you can share with your audience. The process takes a few clicks — and the publish dialog packs some useful options worth knowing about.
## Publishing Process
Make sure you [preview your tent](/working-with-tents/previewing-tents) first. Then, in the tent editor, click **Publish** at the top right.
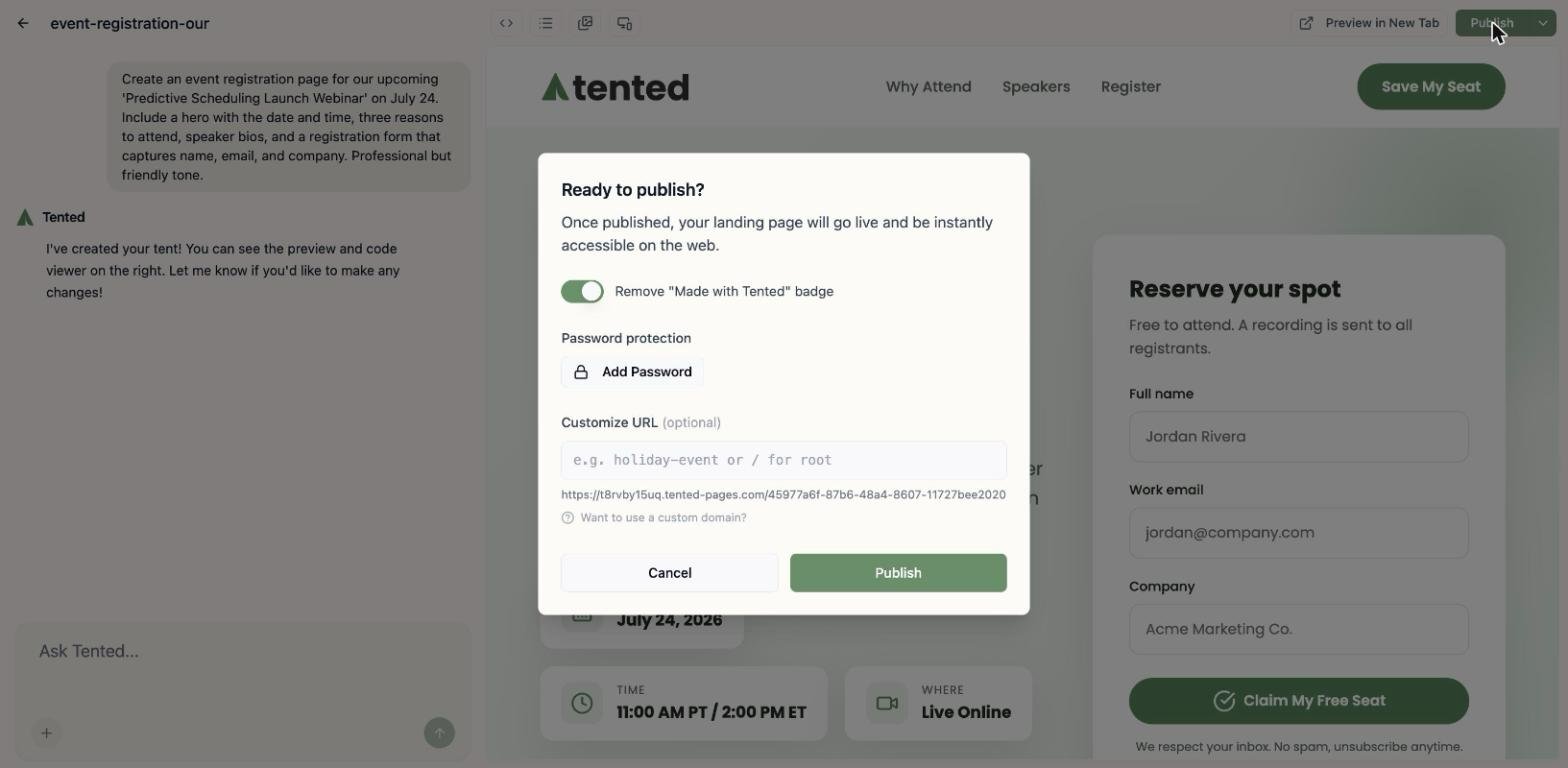 The dialog gives you three options before you go live:
* **Remove "Made with Tented" badge** — hide the badge on your published page (available on paid plans).
* **Password protection** — click **Add Password** to gate the page. Great for internal reviews and client previews.
* **Customize URL** — replace the auto-generated ID with a friendly slug, like `/launch-webinar`. You can also change it later via **Tent Actions > Customize URL**.
Click **Publish**, and within seconds you'll get your live URL:
The dialog gives you three options before you go live:
* **Remove "Made with Tented" badge** — hide the badge on your published page (available on paid plans).
* **Password protection** — click **Add Password** to gate the page. Great for internal reviews and client previews.
* **Customize URL** — replace the auto-generated ID with a friendly slug, like `/launch-webinar`. You can also change it later via **Tent Actions > Customize URL**.
Click **Publish**, and within seconds you'll get your live URL:
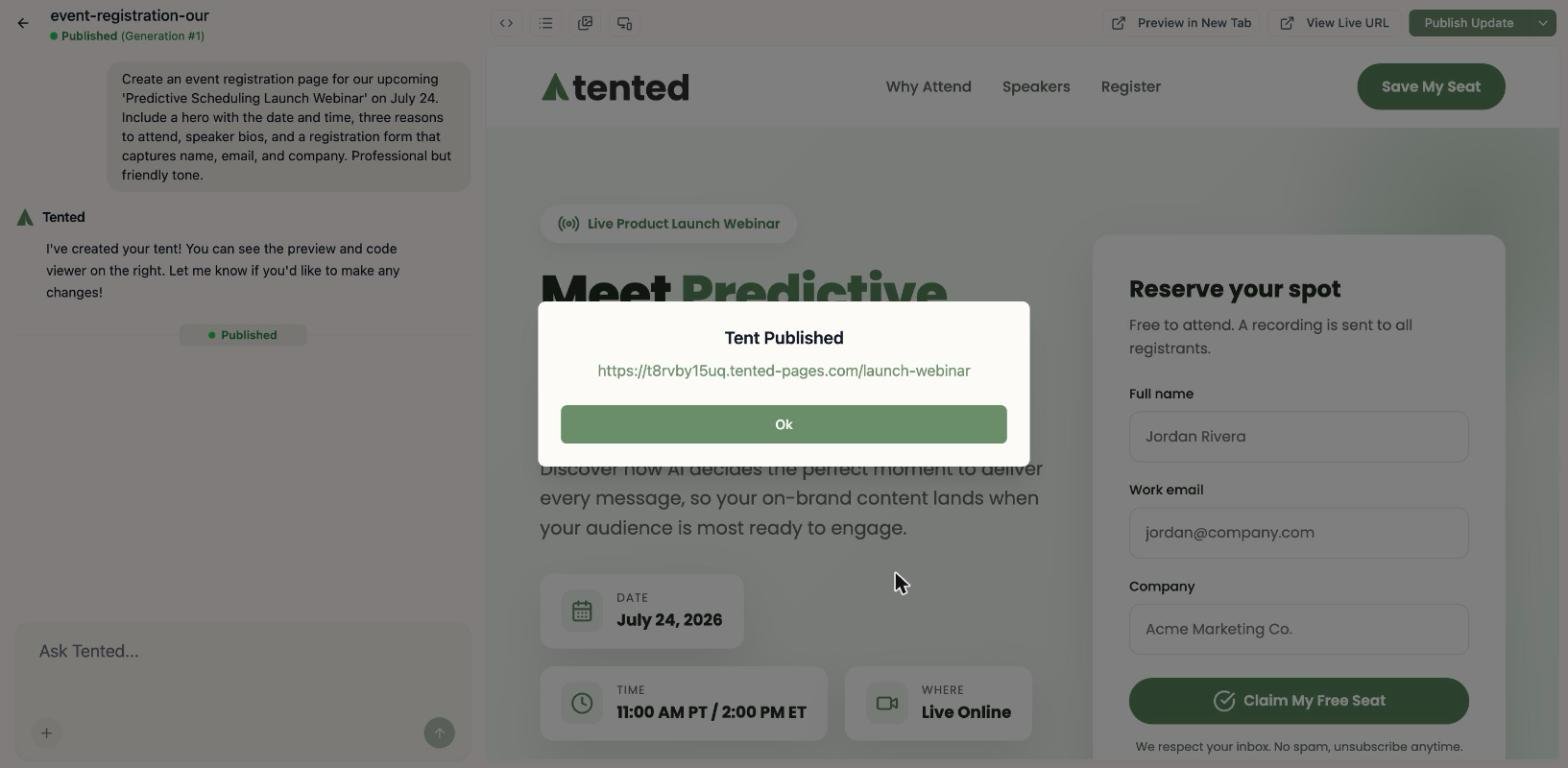 Your tent is now accessible worldwide. In the editor, the status badge switches to **Published**, and you'll see **View Live URL** and **Publish Update** buttons at the top.
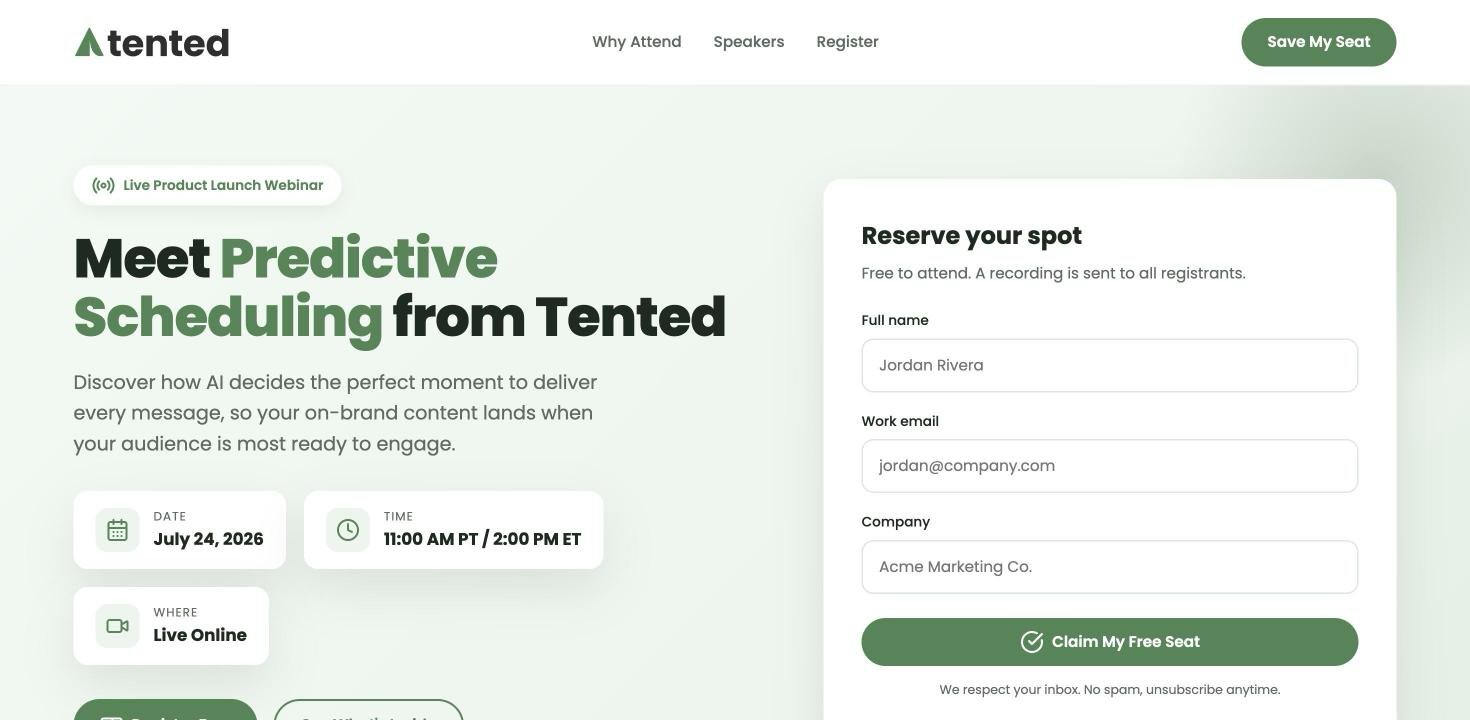 Once published, edits don't go live automatically — keep iterating safely in the editor, then click **Publish Update** when you're ready to ship the changes.
## About Domains and URLs
Your tent gets a unique URL on your workspace's subdomain:
* Format: `https://[workspace-slug].tented-pages.com/[custom-slug-or-id]`
* SSL certificate included
* Global CDN for fast loading
Pick the path yourself in the publish dialog (or via **Tent Actions > Customize URL**) — `/launch-webinar` beats `/45977a6f-87b6...` on any billboard.
Serve tents from your own domain with a CNAME alias (paid plans). See our [Custom Domains](/configuring-tented/custom-domains) guide.
## Password-protecting a tent
Want to keep a published tent private — for an internal review, a client preview, or a gated launch? Add a password, and visitors must enter it before they can see the live page.
You can do this two ways:
* **While publishing** — toggle **Add Password** in the publish dialog.
* **Anytime after** — on the **Tent Details** page, choose **Tent Actions > Add Password**.
Either opens the password panel. Click **Add Password**, enter one (at least 4 characters), and **Save**.
Once published, edits don't go live automatically — keep iterating safely in the editor, then click **Publish Update** when you're ready to ship the changes.
## About Domains and URLs
Your tent gets a unique URL on your workspace's subdomain:
* Format: `https://[workspace-slug].tented-pages.com/[custom-slug-or-id]`
* SSL certificate included
* Global CDN for fast loading
Pick the path yourself in the publish dialog (or via **Tent Actions > Customize URL**) — `/launch-webinar` beats `/45977a6f-87b6...` on any billboard.
Serve tents from your own domain with a CNAME alias (paid plans). See our [Custom Domains](/configuring-tented/custom-domains) guide.
## Password-protecting a tent
Want to keep a published tent private — for an internal review, a client preview, or a gated launch? Add a password, and visitors must enter it before they can see the live page.
You can do this two ways:
* **While publishing** — toggle **Add Password** in the publish dialog.
* **Anytime after** — on the **Tent Details** page, choose **Tent Actions > Add Password**.
Either opens the password panel. Click **Add Password**, enter one (at least 4 characters), and **Save**.
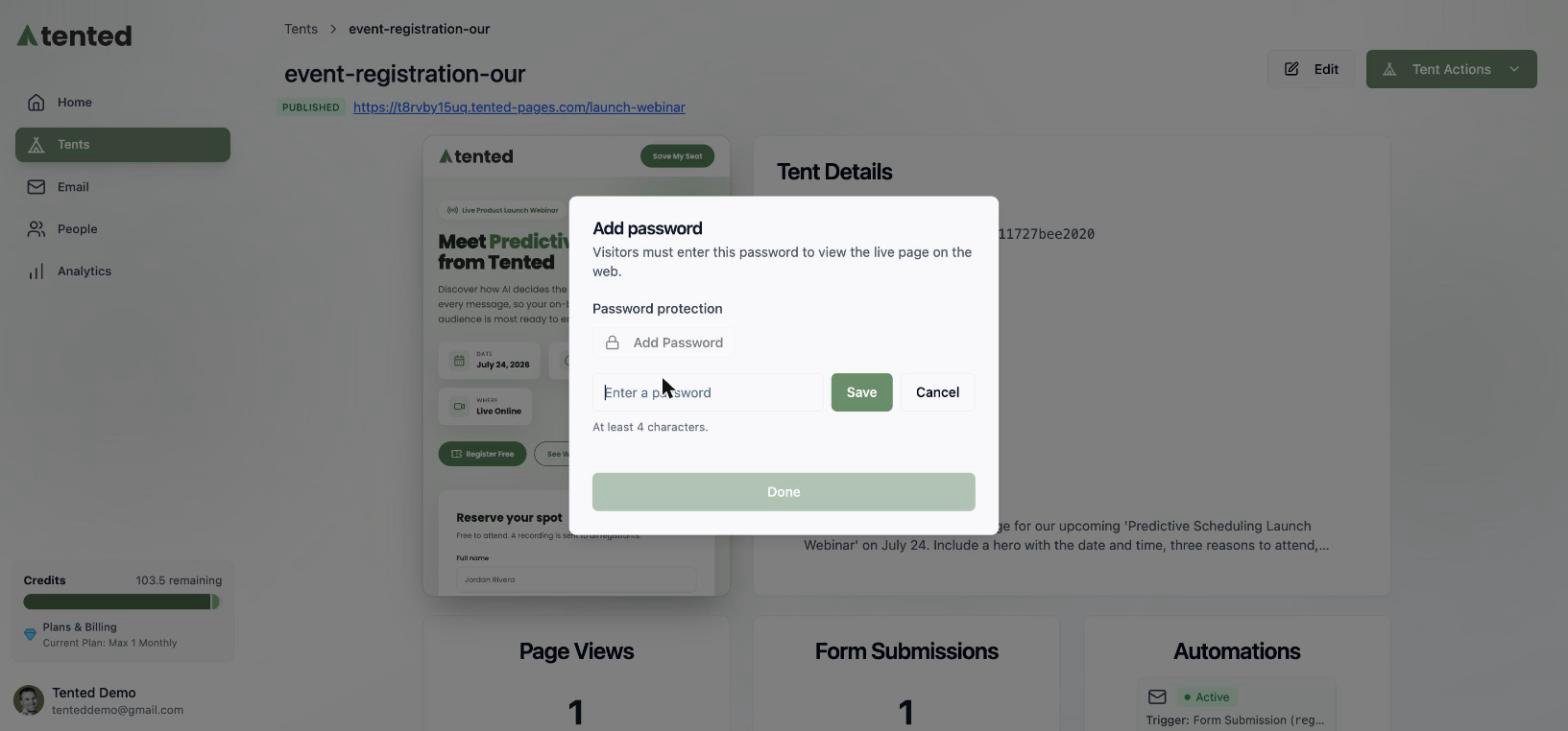 From the same panel you can later change or remove the password. Remove it and the page is public again — no republish needed.
Password protection is available on paid plans.
## Publishing Updates
When you publish updates to an existing tent, the important things stay stable: your URL doesn't change, form submission data is preserved, and analytics keep tracking seamlessly. Update your content as often as you like without disrupting anything.
## Unpublishing
Changed your mind? **Tent Actions > Unpublish** takes the page off the web — the URL goes inactive and the tent returns to **Draft**. You can republish anytime.
Learn how to view, manage, and export form submission data.
From the same panel you can later change or remove the password. Remove it and the page is public again — no republish needed.
Password protection is available on paid plans.
## Publishing Updates
When you publish updates to an existing tent, the important things stay stable: your URL doesn't change, form submission data is preserved, and analytics keep tracking seamlessly. Update your content as often as you like without disrupting anything.
## Unpublishing
Changed your mind? **Tent Actions > Unpublish** takes the page off the web — the URL goes inactive and the tent returns to **Draft**. You can republish anytime.
Learn how to view, manage, and export form submission data.