> ## Documentation Index
> Fetch the complete documentation index at: https://docs.tented.ai/llms.txt
> Use this file to discover all available pages before exploring further.
# Getting Started
> Launch your first landing page and email campaign with Tented
## Welcome to Tented 🏕️
Tented is an AI marketing automation platform: instant landing pages, AI-written marketing email, a built-in contact database, and automated campaigns — all driven by natural language. This guide gets you from a fresh account to a live page *and* your first email campaign.
 ## The lay of the land
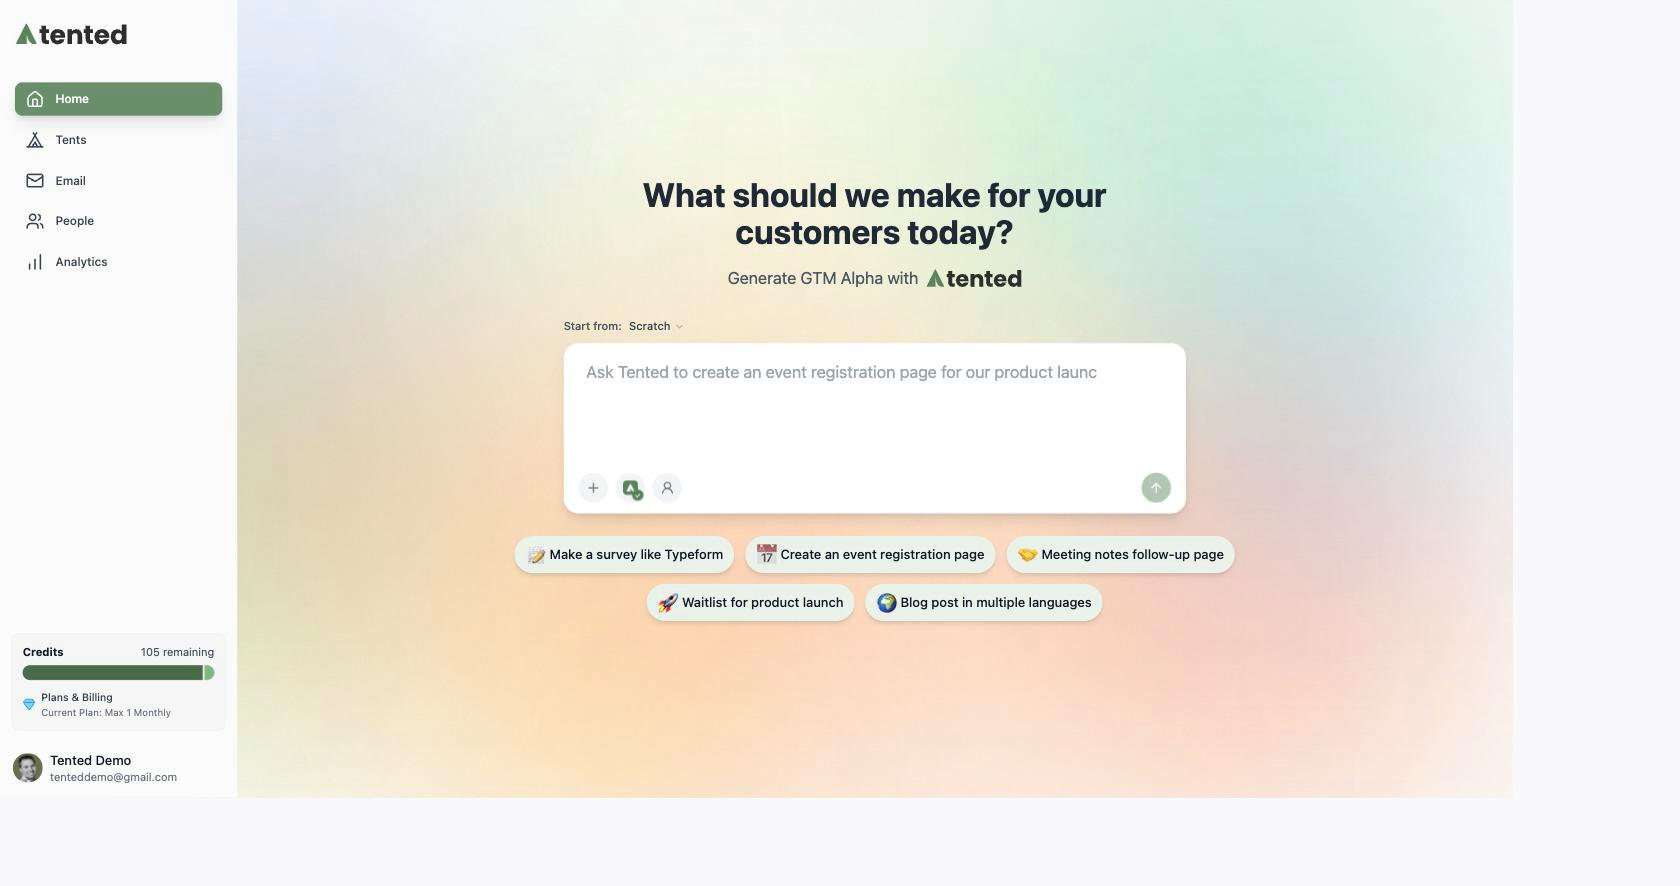
Your sidebar has everything:
* **Home** — the prompt box. Describe something and Tented builds it.
* **Tents** — your AI-generated landing pages. (A **tent** is a complete, standalone page you can publish instantly.)
* **Email** — your emails, templates, and campaigns (blasts and triggered flows).
* **People** — your contact database and lists.
* **Analytics** — how it's all performing.
## Step 1: Add your branding
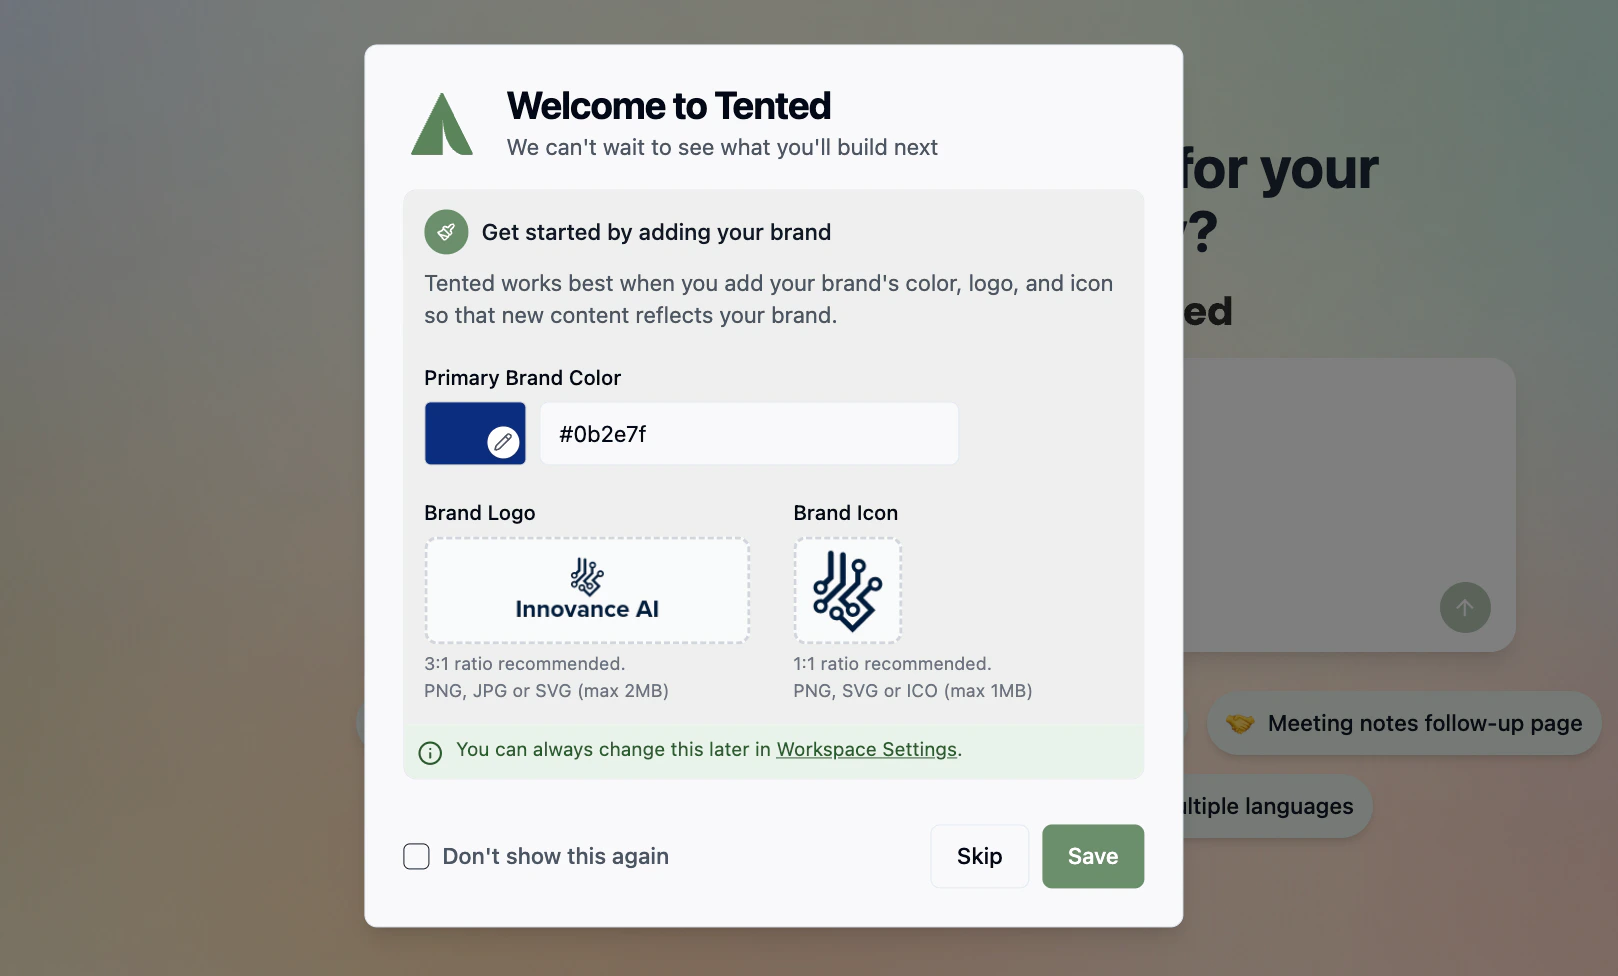
Upload your logo, icon, and brand color when prompted at signup (or anytime in [Workspace Settings](/configuring-tented/workspace-settings)). Tented uses them everywhere — tents *and* emails — so everything comes out on-brand automatically.
## The lay of the land
Your sidebar has everything:
* **Home** — the prompt box. Describe something and Tented builds it.
* **Tents** — your AI-generated landing pages. (A **tent** is a complete, standalone page you can publish instantly.)
* **Email** — your emails, templates, and campaigns (blasts and triggered flows).
* **People** — your contact database and lists.
* **Analytics** — how it's all performing.
## Step 1: Add your branding
Upload your logo, icon, and brand color when prompted at signup (or anytime in [Workspace Settings](/configuring-tented/workspace-settings)). Tented uses them everywhere — tents *and* emails — so everything comes out on-brand automatically.
 ## Step 2: Create your first tent
On the **Home** page, describe the landing page you want:
> "Generate a landing page for our new feature, 'Predictive Scheduling'. The page must be high-converting and focused solely on capturing early access signups. Include a hero section, features, and pricing."
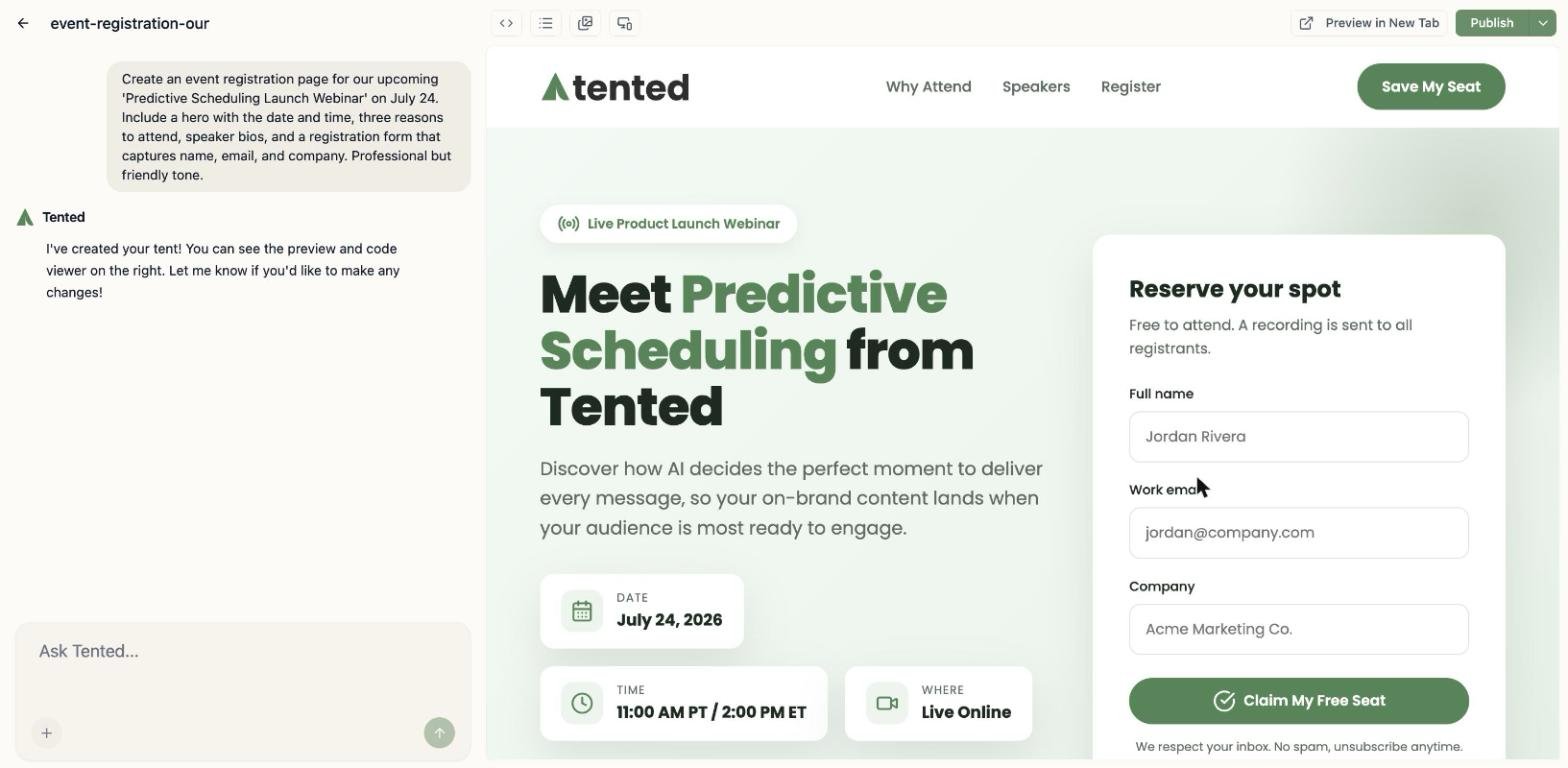
Tented generates a complete, responsive page in about a minute. Refine it by chatting ("make the CTA bigger", "add testimonials"), then click **Publish** to put it live on the web.
## Step 2: Create your first tent
On the **Home** page, describe the landing page you want:
> "Generate a landing page for our new feature, 'Predictive Scheduling'. The page must be high-converting and focused solely on capturing early access signups. Include a hero section, features, and pricing."
Tented generates a complete, responsive page in about a minute. Refine it by chatting ("make the CTA bigger", "add testimonials"), then click **Publish** to put it live on the web.
 For the full tour — editing, code mode, form submissions, publishing — see [Creating Tents](/working-with-tents/creating-tents).
## Step 3: Set up email
One-time setup, about ten minutes, and most of that is waiting for DNS:
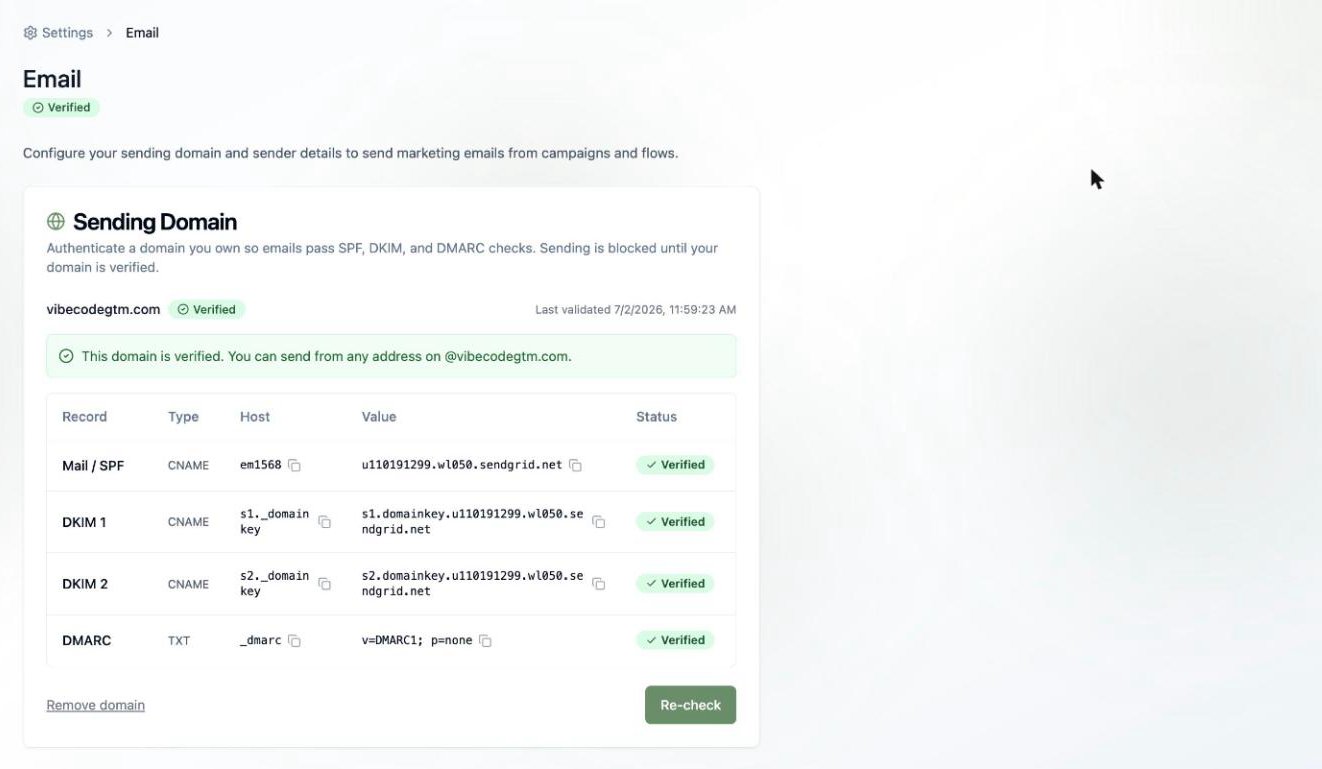
1. Go to **Settings > Email** and add your **sending domain**. Copy the generated DNS records into your DNS provider and verify.
2. Fill out your **sender profile** (company name and mailing address — required by anti-spam law).
3. Set your **default from name and address**.
For the full tour — editing, code mode, form submissions, publishing — see [Creating Tents](/working-with-tents/creating-tents).
## Step 3: Set up email
One-time setup, about ten minutes, and most of that is waiting for DNS:
1. Go to **Settings > Email** and add your **sending domain**. Copy the generated DNS records into your DNS provider and verify.
2. Fill out your **sender profile** (company name and mailing address — required by anti-spam law).
3. Set your **default from name and address**.
 Full walkthrough: [Setting Up Email](/email/email-setup).
## Step 4: Add your people
Head to **People** and bring in your contacts — one at a time with **Quick Add**, or in bulk with **Import from CSV** (Tented auto-maps your columns). Then organize them into [lists](/people/working-with-lists): hand-picked **static lists**, or rule-based **dynamic lists** that keep themselves current.
Full walkthrough: [Setting Up Email](/email/email-setup).
## Step 4: Add your people
Head to **People** and bring in your contacts — one at a time with **Quick Add**, or in bulk with **Import from CSV** (Tented auto-maps your columns). Then organize them into [lists](/people/working-with-lists): hand-picked **static lists**, or rule-based **dynamic lists** that keep themselves current.
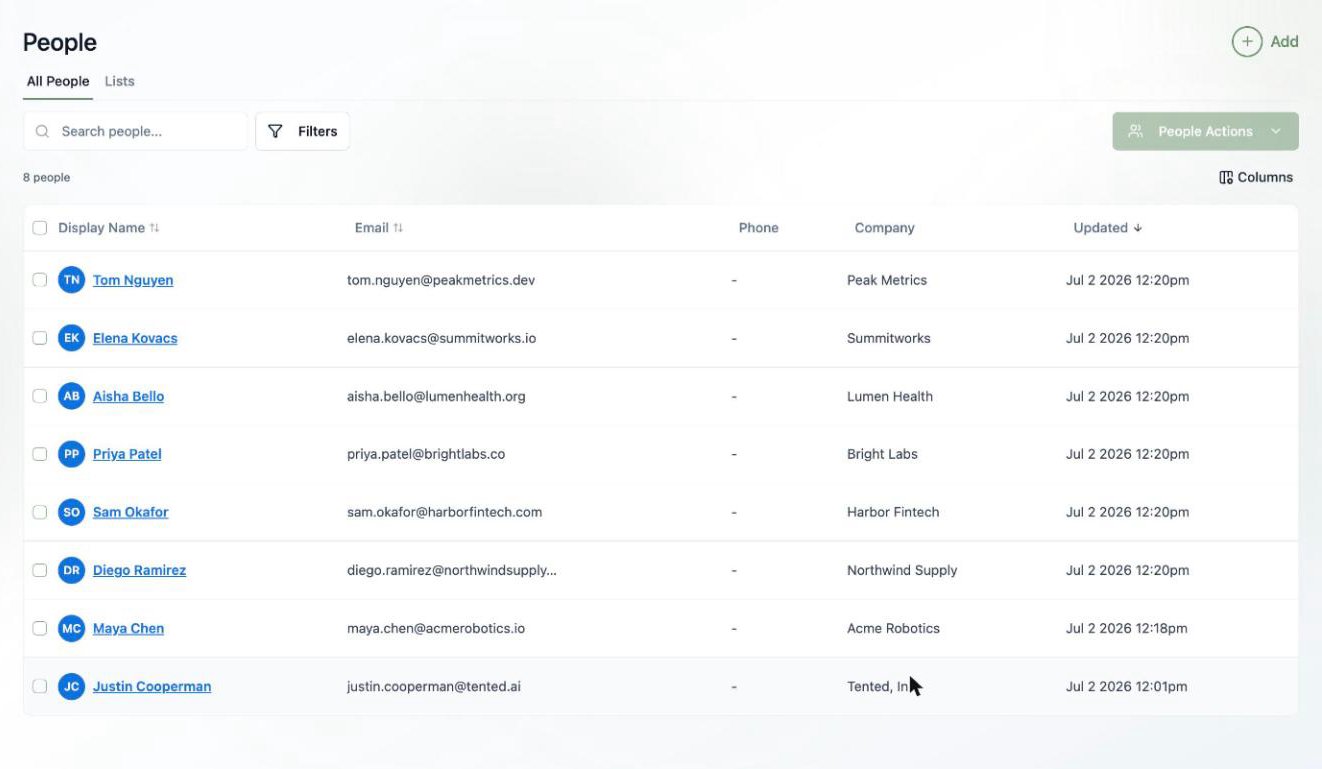 Tents and People are connected: form submissions from your published tents can flow straight into your contact database.
## Step 5: Send your first campaign
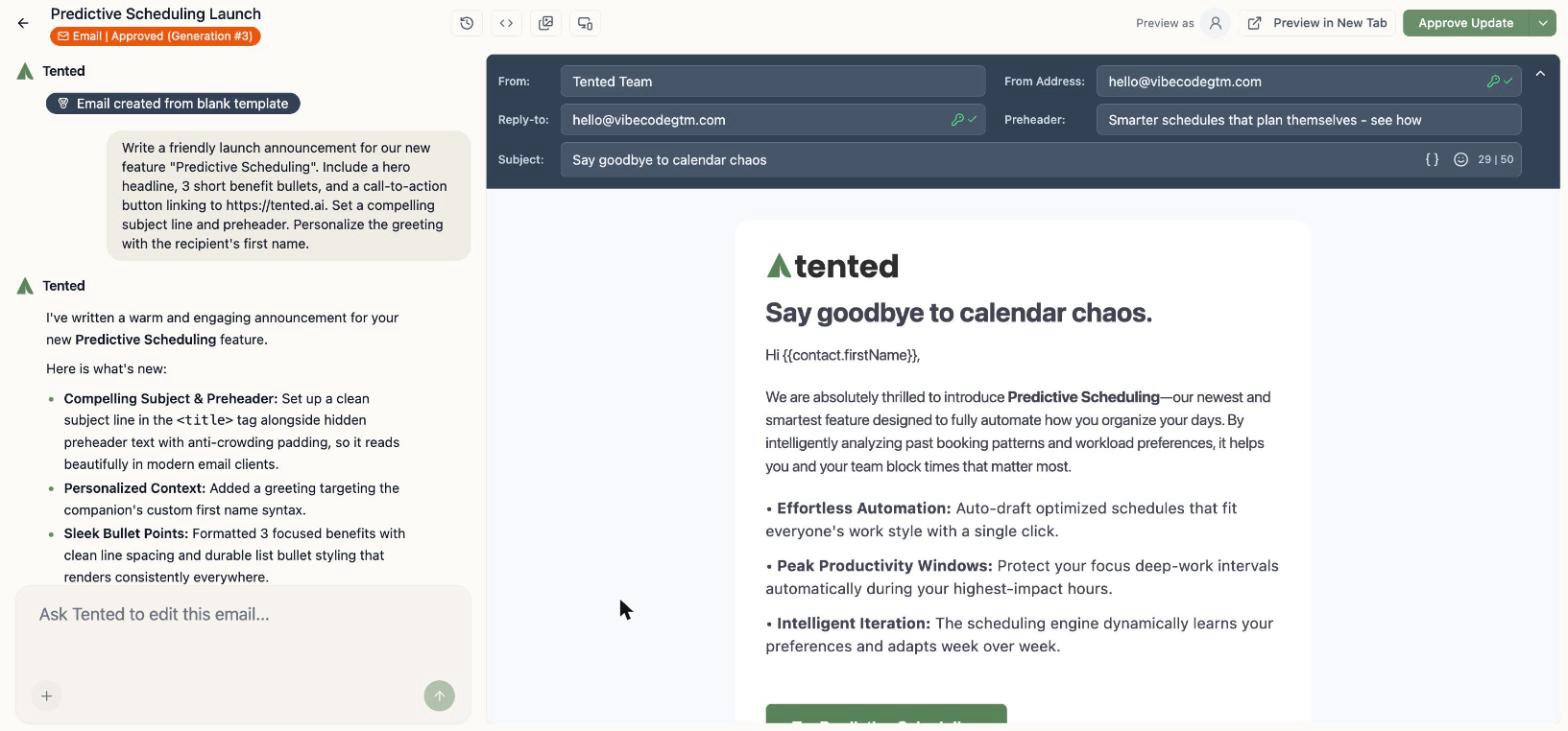
1. Go to **Email > Add > Create Email**, and describe the email you want — Tented writes and designs it, personalization tokens and all.
2. Click **Approve** when you're happy (only approved emails can send).
3. Go to **Campaigns > Create Email Blast**: pick your list, pick your email, and **Send now** (or schedule it).
Tents and People are connected: form submissions from your published tents can flow straight into your contact database.
## Step 5: Send your first campaign
1. Go to **Email > Add > Create Email**, and describe the email you want — Tented writes and designs it, personalization tokens and all.
2. Click **Approve** when you're happy (only approved emails can send).
3. Go to **Campaigns > Create Email Blast**: pick your list, pick your email, and **Send now** (or schedule it).
 Then watch opens, clicks, and deliveries roll in on the blast's results dashboard.
## Step 6: Put it on autopilot
Once the manual version feels good, automate it: [triggered flows](/email/triggered-flows) enroll contacts automatically — when they're added to a list, submit a tent form, or hit a date — and walk them through multi-step journeys with emails, waits, and branches.
## Where to next?
Master the tent editor, publishing, and form submissions.
Everything about the People area, imports, and profiles.
The AI email editor, personalization, and approval.
Build automated journeys on the visual canvas.
**Need help?** Contact support at [support@tented.ai](mailto:support@tented.ai).
Then watch opens, clicks, and deliveries roll in on the blast's results dashboard.
## Step 6: Put it on autopilot
Once the manual version feels good, automate it: [triggered flows](/email/triggered-flows) enroll contacts automatically — when they're added to a list, submit a tent form, or hit a date — and walk them through multi-step journeys with emails, waits, and branches.
## Where to next?
Master the tent editor, publishing, and form submissions.
Everything about the People area, imports, and profiles.
The AI email editor, personalization, and approval.
Build automated journeys on the visual canvas.
**Need help?** Contact support at [support@tented.ai](mailto:support@tented.ai).